Happy Saturday everybody,
i thought i would give a short update on progress.
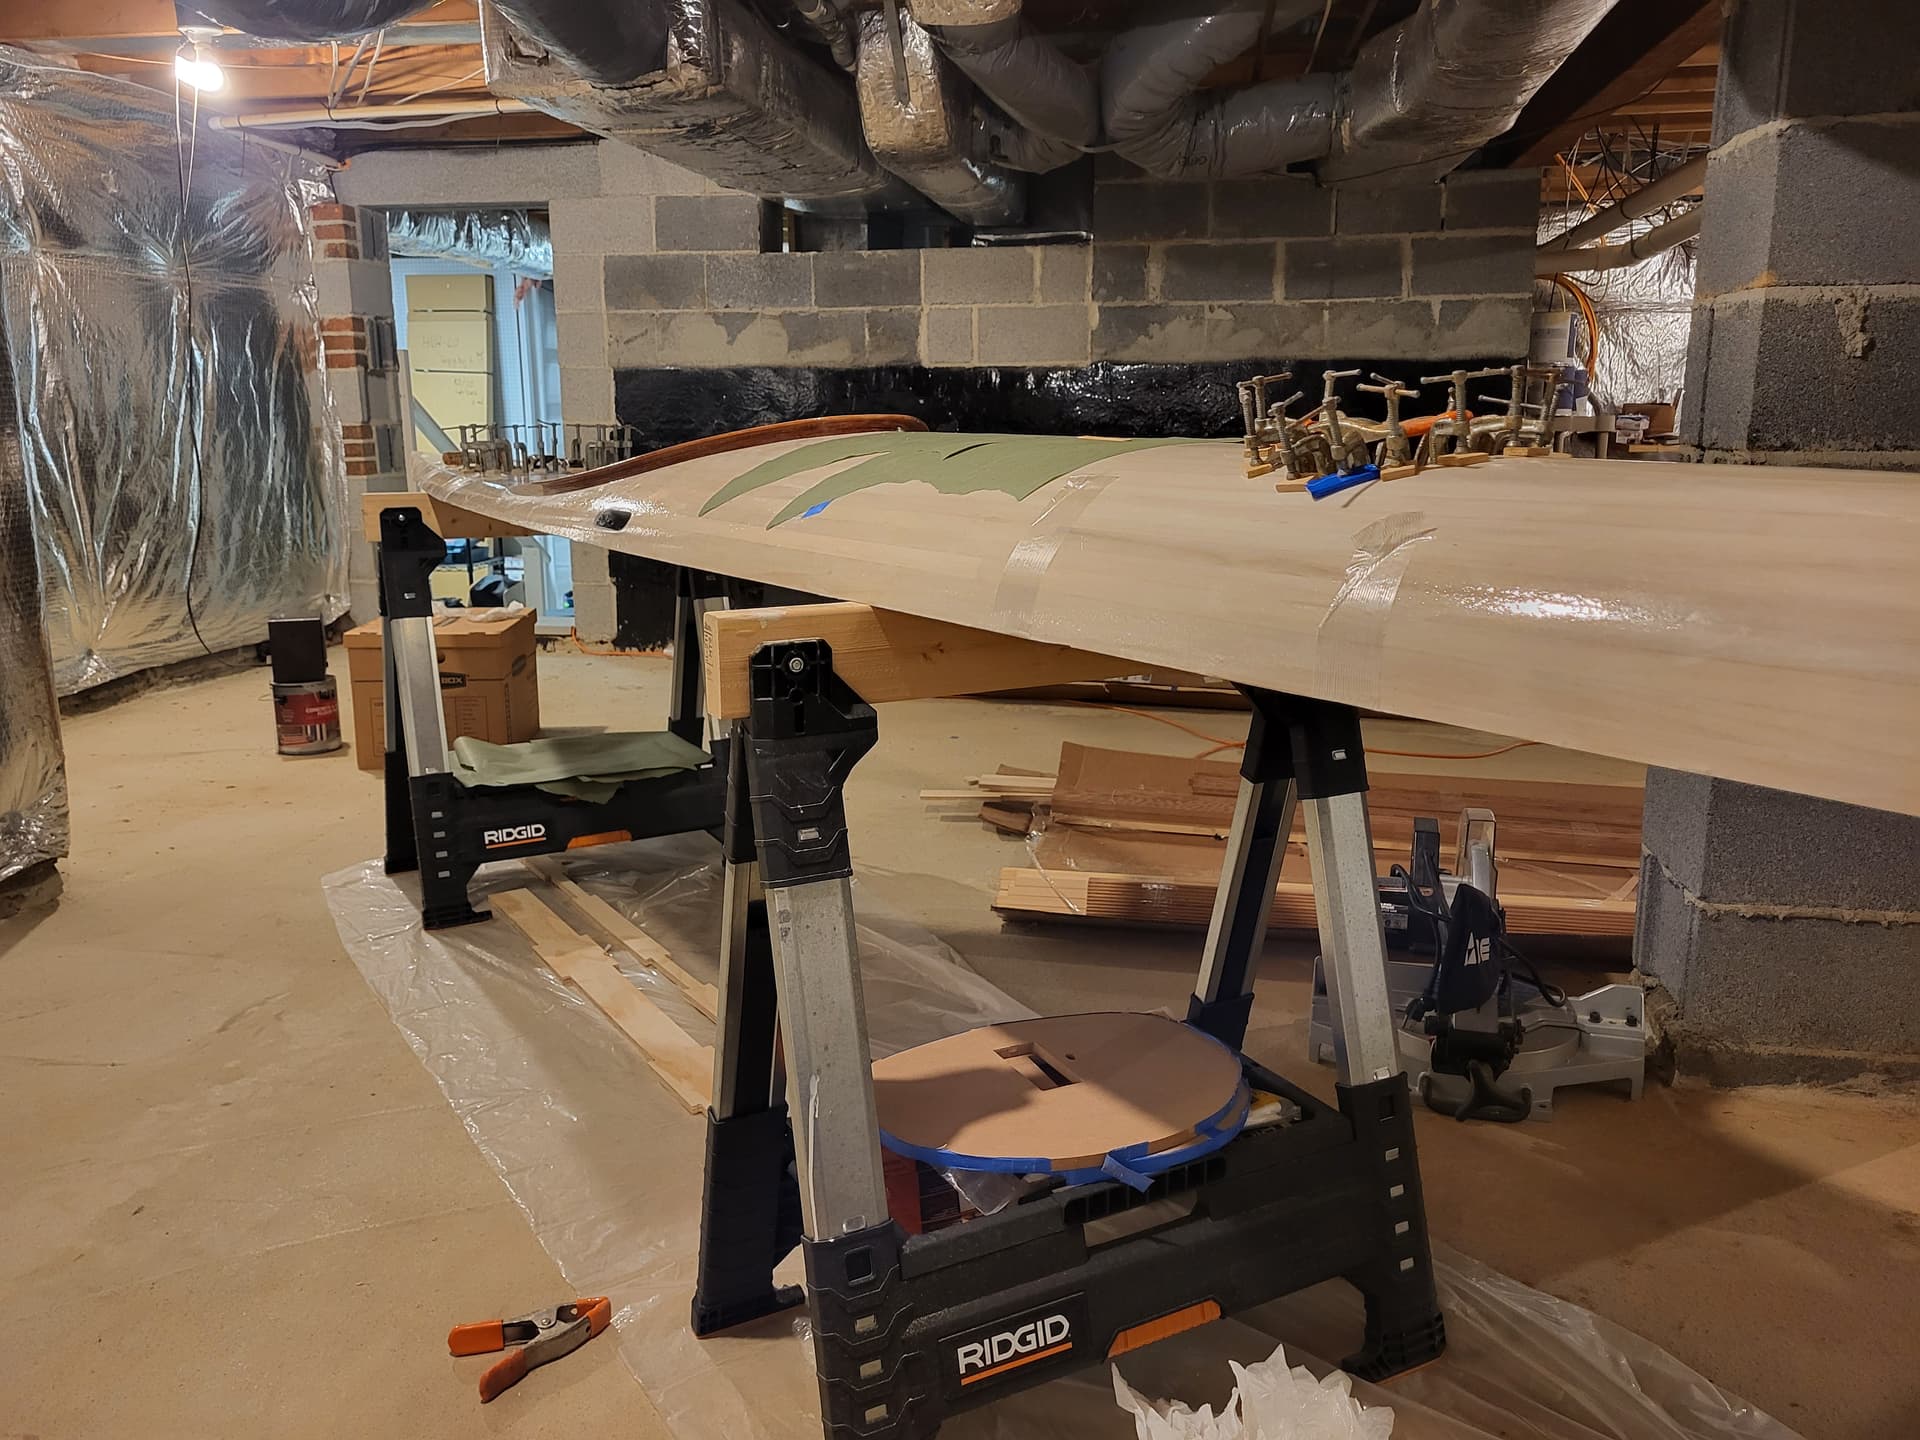
the other night i reached the milestone of joining the hull to the deck. i wanted to share some pictures and techniques. there were some challenges that i had, that others have from time-to-time, talked about and so i thought i could share the approach.
the main issue was that i had was some major time gaps in the project and the deck and hull no longer lined up. i built and glassed parts the hull and deck pieces and then the project sat for over six months not joined.
during this time, parts of the hull and deck had substantially “relaxed” (widened) relative to their original build positions and simply taping them together could not provide enough force for alignment.
the approach was to use scotch filament tape (which has almost no stretch, does not leave residue and attaches well and can be released and repositioned from an epoxy surface) to pull the hull and decks into shape.
the pictures below show this and the tapes were positioned to perfectly align on top of one another:
the hull and deck was then carefully test fitted and minor adjustments were made (hence the importance of a good quality tape that can be released/reattached - do not use cheap amazon chinese product…tried that…will not work) to pull the hull and deck into perfect alignment.
after the test fitting, a thickened mix of epoxy and cell-o-fill was carefully placed between the tape on the hull/deck edges to be joined (stay about 1/2 away from the tape to keep the tape from getting glued into place) and then the pieces were carefully rejoined with new filament tape pieces just pulling the hull and deck together. similar to the test fitting, even during this final gluing, i ended up making a couple minor adjustments on the tape controlling the width of the hull and deck to ensure alignment.
this is what it looked like, as i was waiting for the epoxy to cure and the process of joining the hull and deck took about 90 minutes as i was really focusing on a perfect alignment.
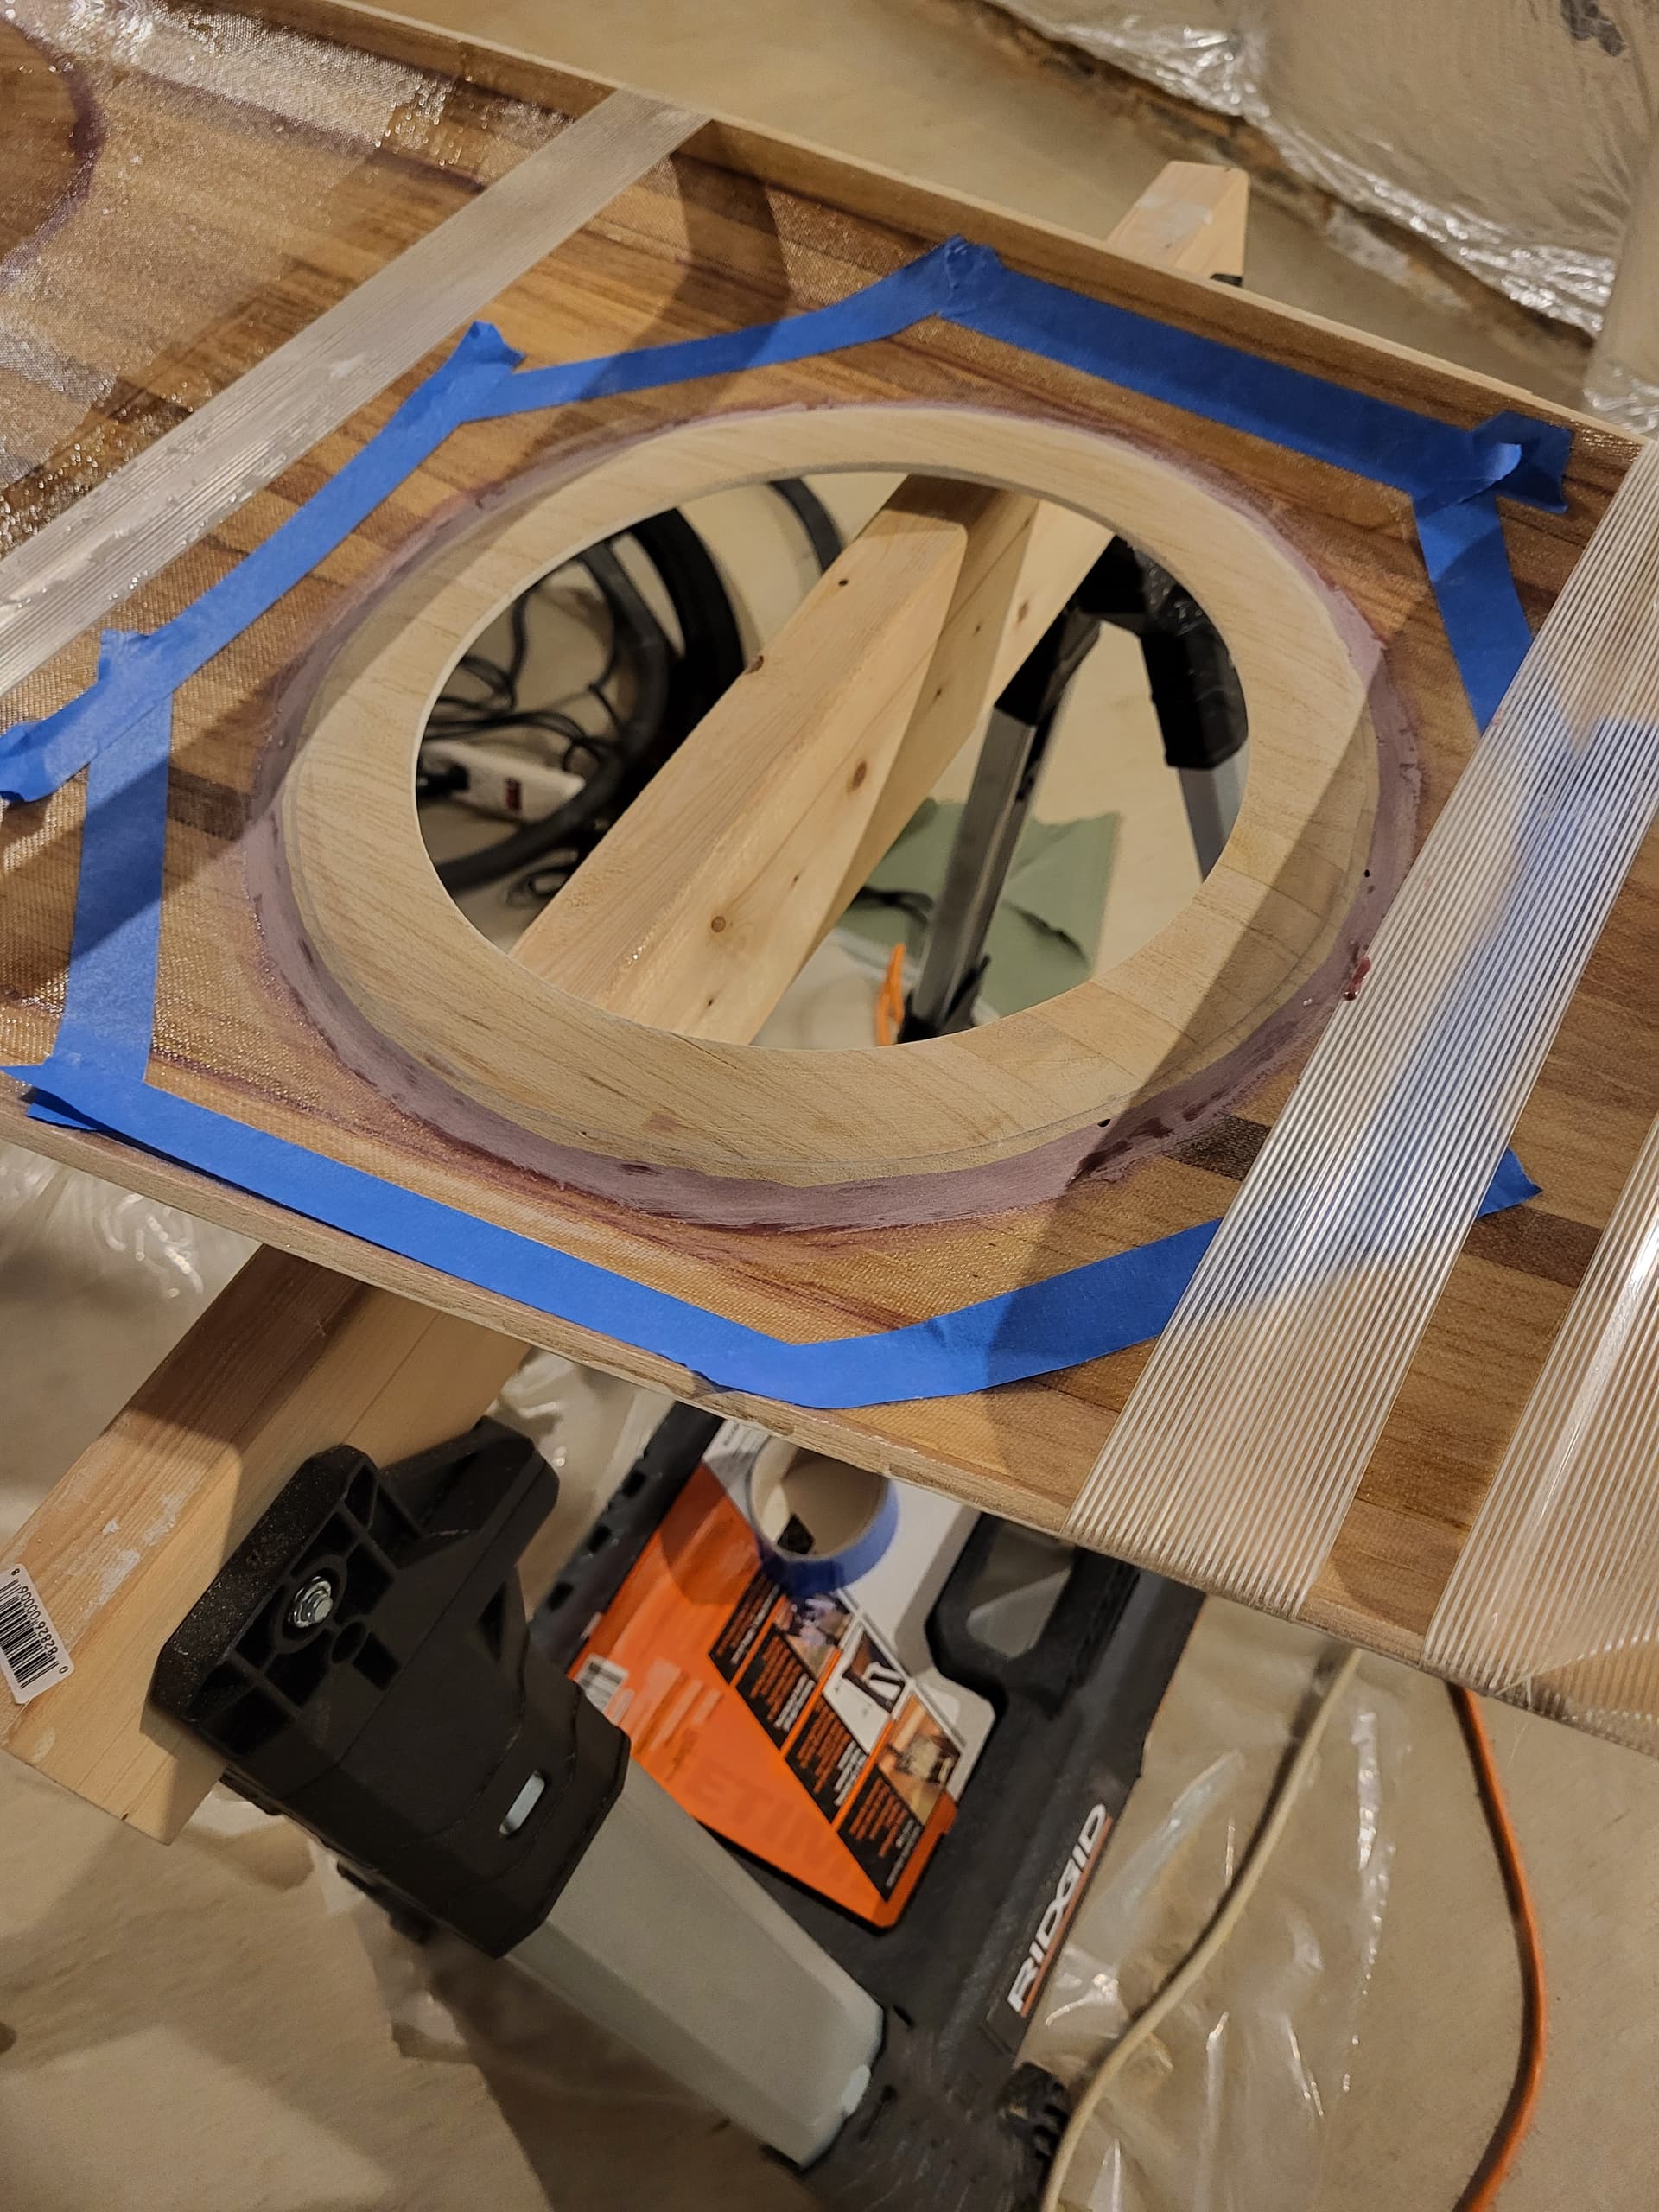
once the tack welds cured, i removed the pieces of tape that crossed hull to deck and then carefully (and i emphasize the word carefully) pulled out the tapes that were controlling the width of the boat.
this was the most challenging piece. so let me discuss ‘carefully’.
in this technique, if you have a tight seam, the tape has basically only its thickness as the size of the hole to be released…(please remember the note above to keep the glue 1/2 or more from the tape). If you try to pull a piece of tape out that is not perfectly flat (like a piece of crinkled tape that was stuck to itself), it can act like a stopper knot and cannot be pulled through.
anyway, notwithstanding my care, which is more of something i realized after the process then before, there were a couple pieces that were darn challenging to get out. i was ultimately successful but have four cut knuckles and some blood on the boat from my efforts around one particularly recalcitrant piece of tape. there was one moment i was afraid i had gotten my head and one arm stuck in the rear hatch reaching for that piece (had to pull it from the inside out) . i’m writing this, so i was inevitably able to extract myself.
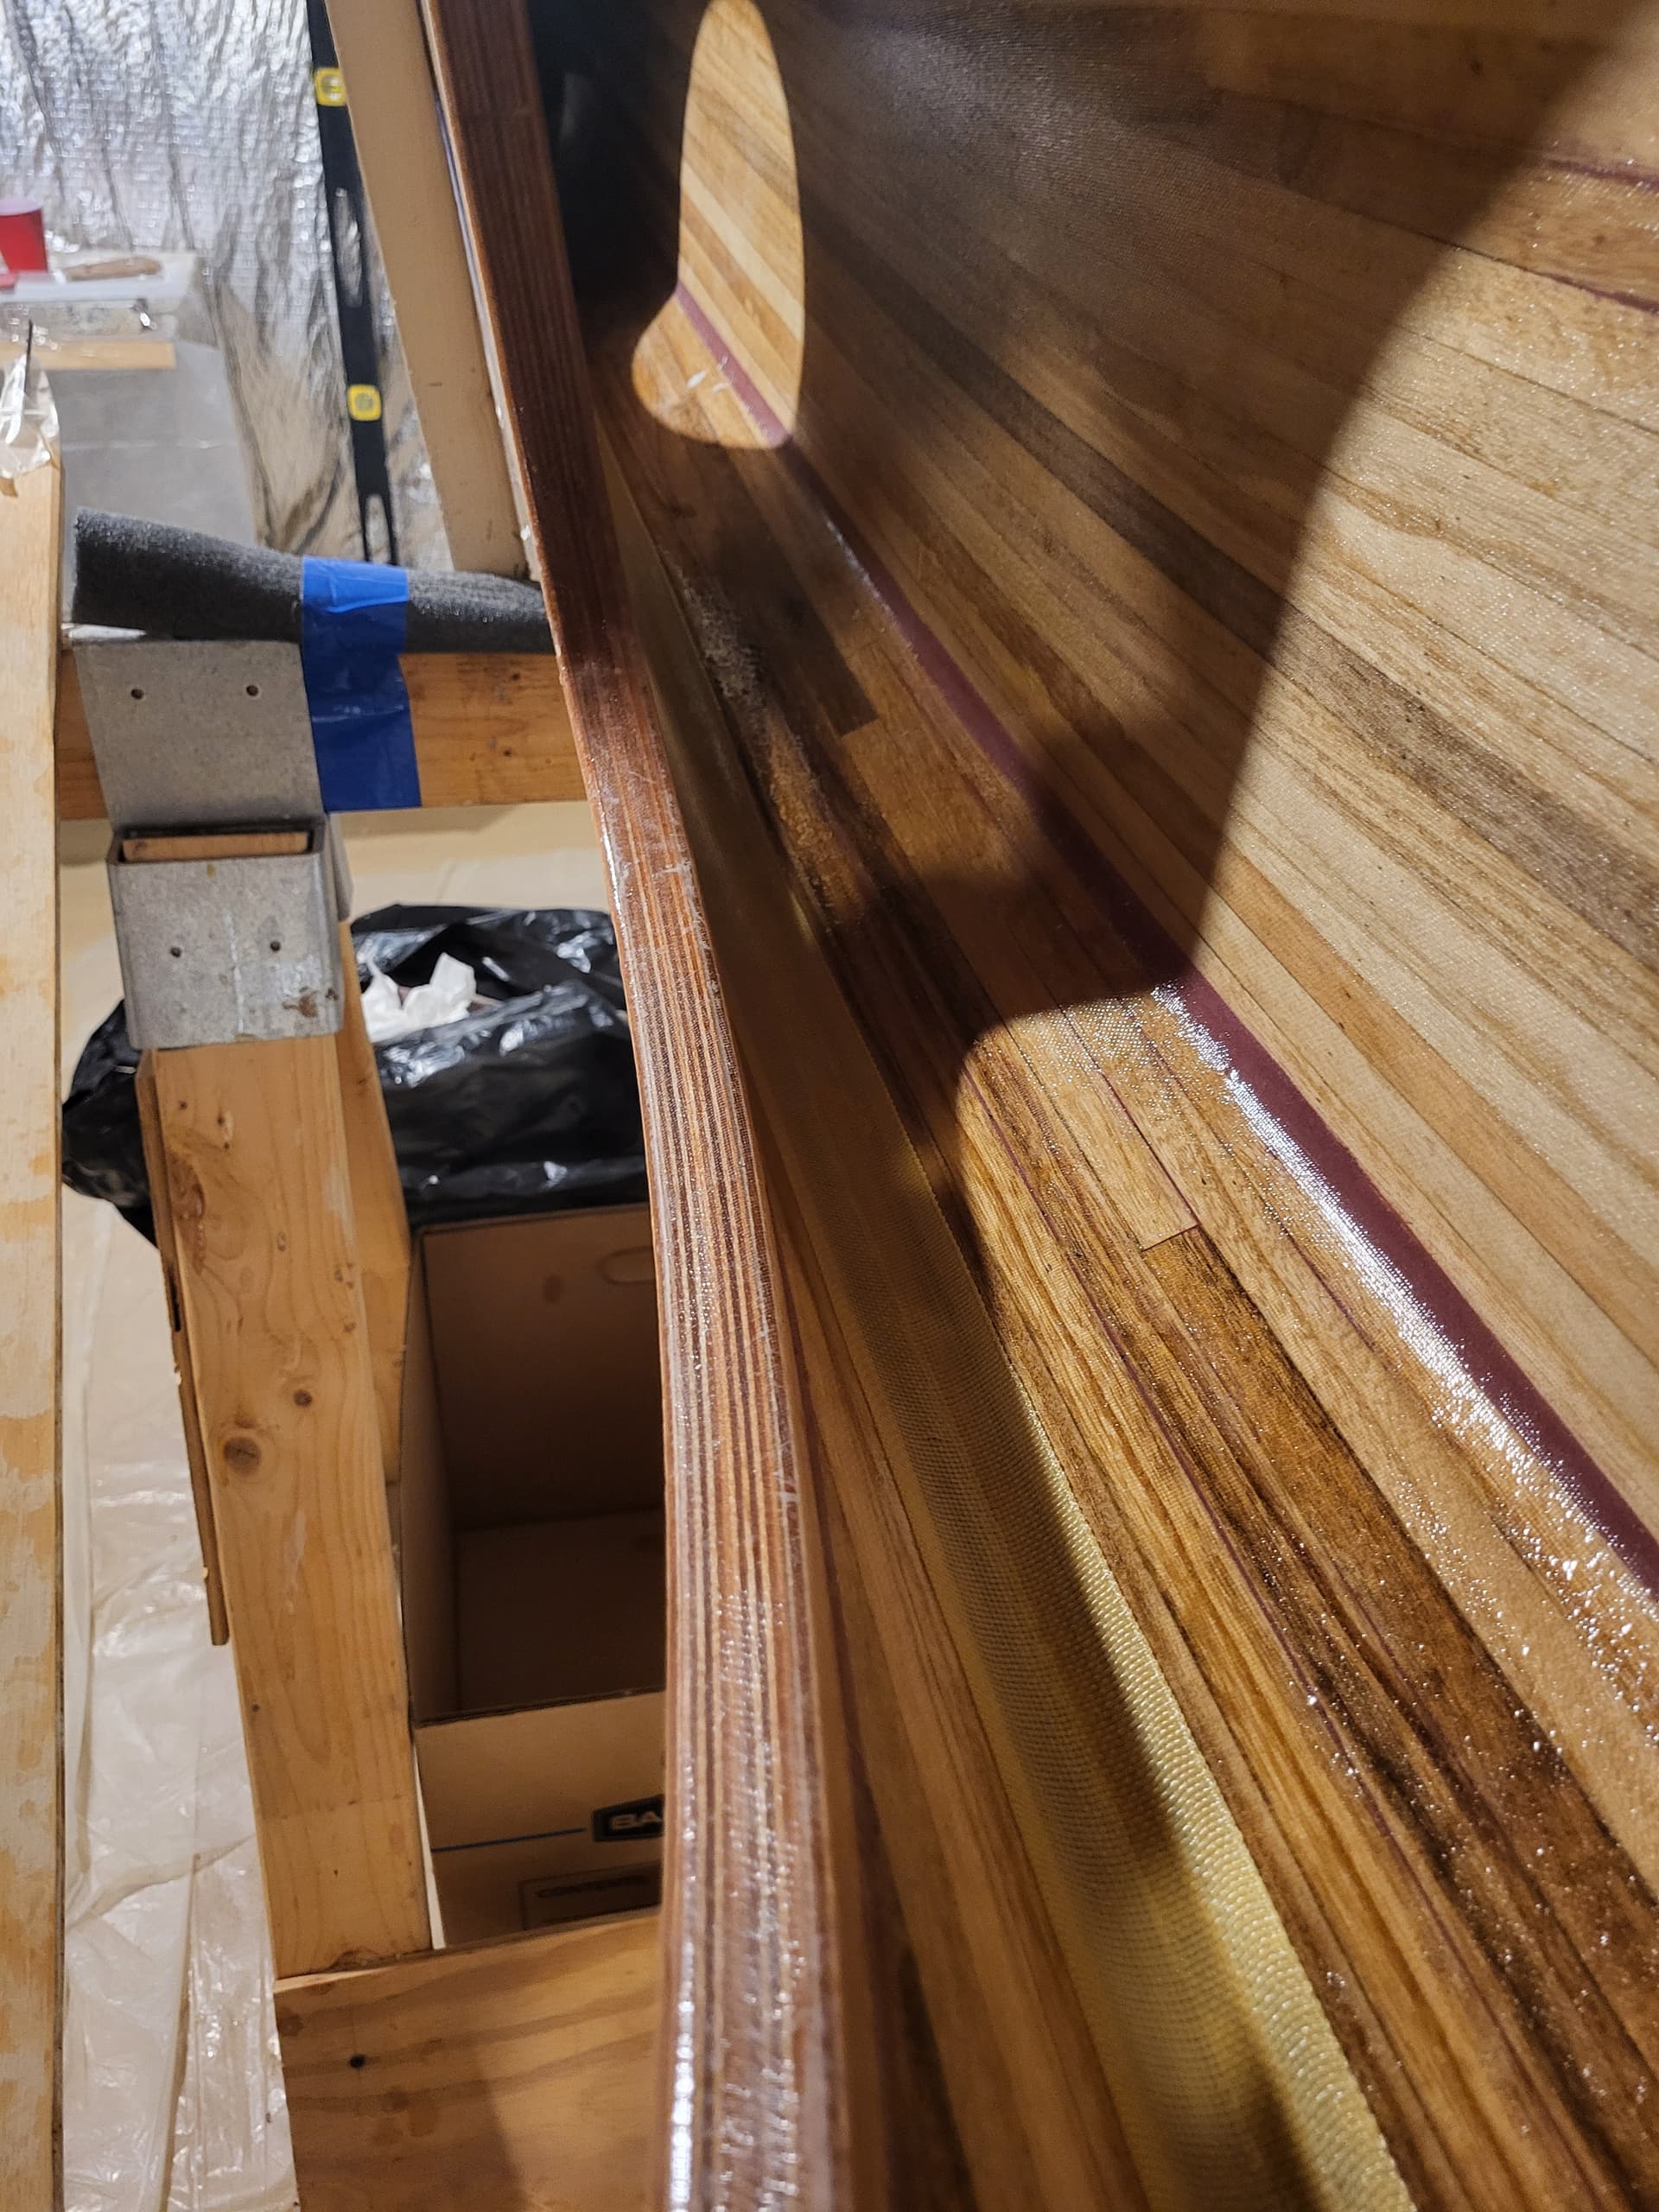
the final result is here:
once the tape is out, if you inspect carefully, you can see the knife like (tape width) gaps in the glued surface. a bit of lightly thickened epoxy was applied with a spatula to fill these little gaps…and i have a perfectly aligned hull and deck - joined 
will now move on to internal seaming and outside sanding and seaming as well to ensure the hull/deck seam has all the structural integrity it needs.
hope this was helpful to everybody
H