Well, it only feels like Christmas for Grandpa because his Peace Canoe kit was delivered today !!
And like any Christmas morning, the package straps were being cut before the delivery driver drove away.
After cutting away 2.74 miles of packing tape from a well packaged kit, all of the individual pieces were separated and ready for inventory. Happy to report that “all present and accounted for” was proclaimed.
Now where are my grandkids to assist in this build ?? It is going to be a long month waiting until they are out of school and it will be difficult not to start the project without them – ugh. Grandpa is going to need to take a patience pill or 2 and perhaps do some lathe work while waiting.
I will chat more down the line as I already have a few “application” questions.
Just a tip about the packing tape - double check that you got it all off and clean off any glue residue. I have been finding bits and pieces of packing tape that I missed and there has been quite a bit of glue residue I have found. I didn’t start paying attention until I either fiberglassed over a piece of tape or their was enough glue residue to prevent the epoxy from penetrating and I had to cut out a piece of fiberglass from the floor of my Jimmy Skiff.
More power to you if you want the kids involved in every aspect of the project, but consider… Waiting for epoxy to harden is a little like watching a pot waiting for it to boil. If your time with the young help might be limited, or they are young enough that attention spans will be short, you could get them involved in the more satisfying/rapid progress parts of contruction if you elect to do a few first steps in advance like completing the puzzle joints on the hull planks and doing some surface pre-coating/sanding on pieces that require (or benefit from) pre-coating prior to assembly. That way, when the young help arrives you’ll be in a better place to actually start boat assembly, rather than doing an hour or two worth of epoxy work and then saying “Well, that’s all we can do today kids, so now go play and come back tomorrow.”
Well, if you have the grandchildren with you for an extended stay, as I think you suggested in your earlier post, you can have other adventures up your sleeve while waiting for epoxy to cure. Take 'em on a long hike, making sure they walk at least twice as far as you do. You know, “Say, young’n’s, what do you suppose is up that branch of the creek? Why don’t you dash up there and report back whether it’s worth a look.” Of course, always have your folding camp stool along so you don’t have to sit on the ground (from which you will than have to get up!) while they explore. <;-)
Seriously, I was fortunate that my adult offspring and grandchildren lived within easy driving distance of me when we built a Passagemaker Dinghy as a family project about ten years ago. Those grandchildren are mostly young adults now. I wish you all joy of making great memories with yours! <;-)
I hope to keep them entertained with the “boat building” and other side activities when their attention begins to lapse. I know that after a few hours of “work” the Xbox, YouTube, and whatever else will be calling them and they may not be able to resist. That is okay; we do not have a time clock.
Fortunately, with this particular kit, we should be able to see some progress pretty quick. One of the main reasons I chose this kit is that there is NO epoxy or fiberglass in the build. I thought for a first boat project I would keep it simple with relatively quick “rewards” in seeing parts come together. I told them that we are building a wooden Lego – that comment got their undivided attention.
Hi Michael,
I hope to make it an enjoyable experience for them. I intend to let them do everything that they are capable of doing on this project. Drive every nail, screw, squeeze the adhesive out of the caulk gun and do the painting (outside in old clothes so as not to feel the wrath of the MOM).
I will have a log book for each of them and they can record their “building adventure” with photos that we take. And of course, we will play the boat song (Boats To Build by Guy Clark) every morning before we start.
We should see quick progress (as mentioned in an earlier post) so maybe I can keep their enthusiasm up.
I think I read somewhere that Root Beer floats help !!
Here is a very nice sentiment in song that fits this thread. “Wooden Boat” by Del Suggs. https://www.youtube.com/watch?v=HSFjistk7i8 If you’ve never heard his music, look him up. Some great music.
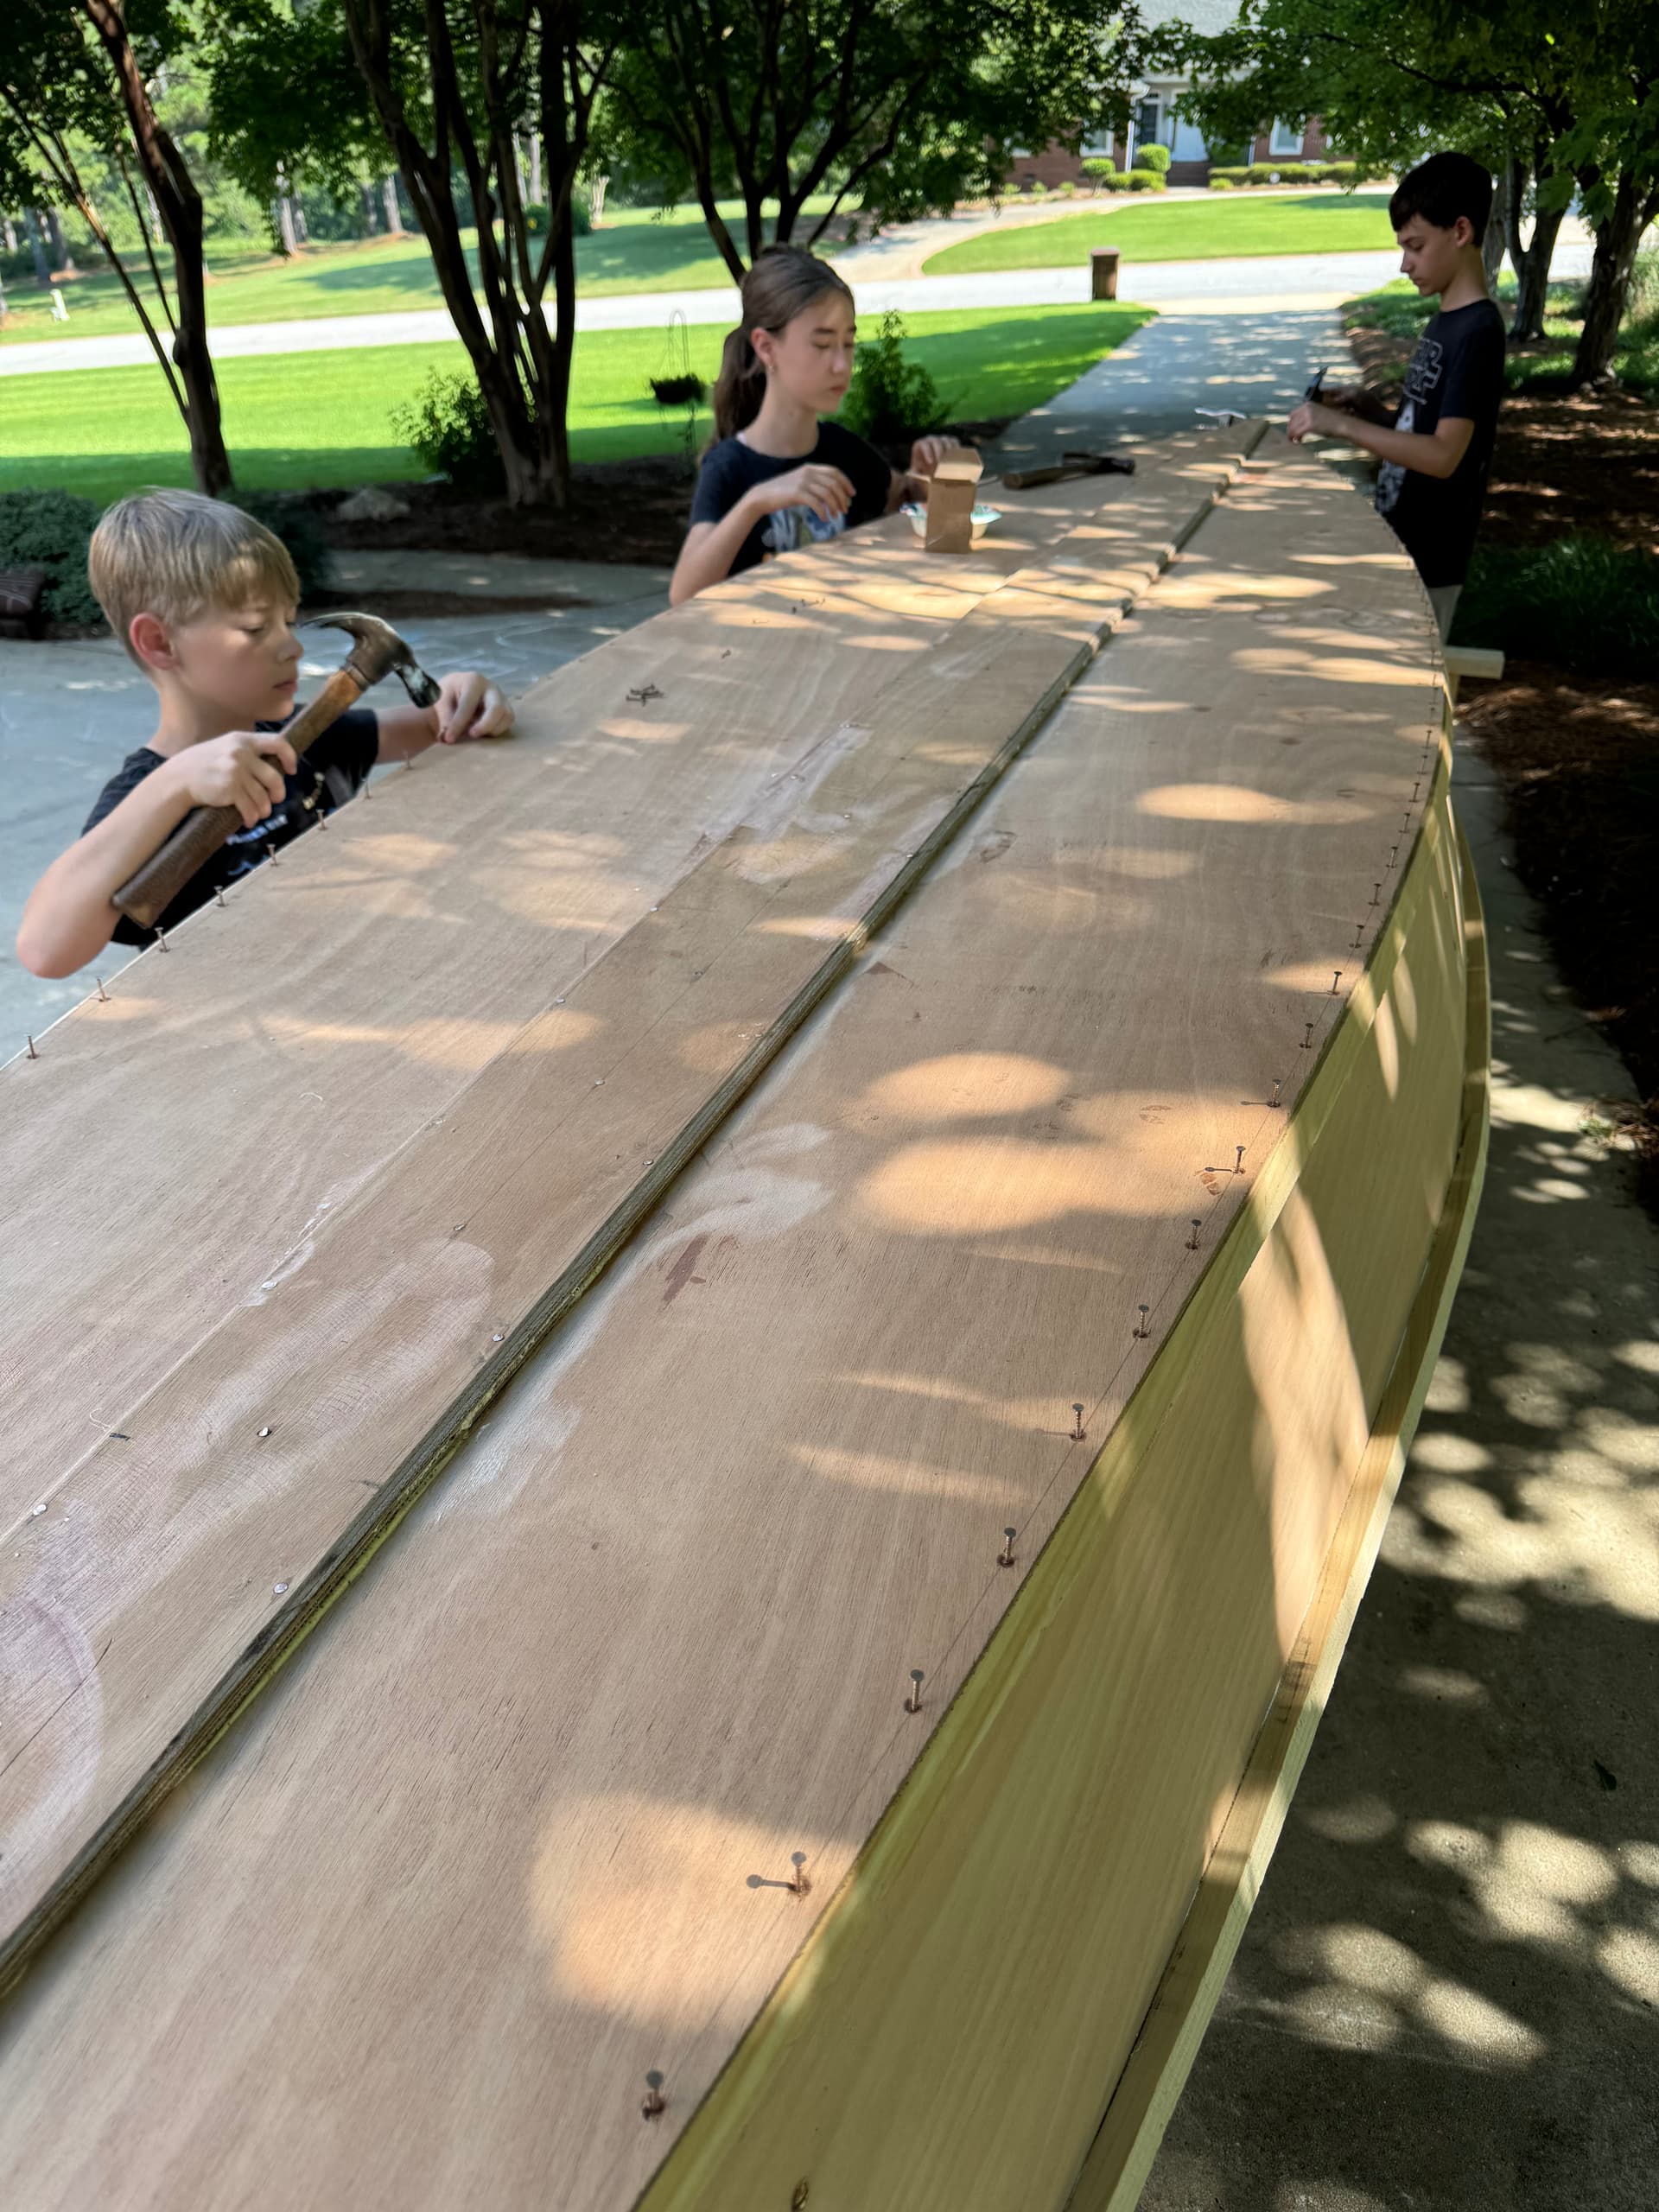
Settle down, settle down - I know ! That was a lot of unnecessary drilling on all of those parts. You zoomed in on the photo and saw all of those pre-drilled and slightly counterbored holes and wonder WHY ? (BTW that operation could have been a 20-minute CNC routine for all of the 15 parts)
Normally, the well experienced would have no issue knowing where to put the nail and how to drive it for a good sound connection – we don’t give it a second thought.
Remember that this build is for two grandkids (13 & 11) that have little or no experience setting a nail. While they are remarkably proficient at the Xbox controller with buttons, triggers and toggles I suspect that they haven’t driven 20 nails between them.
I want to make this build easy for them without smashed fingers and the pilot holes will help save on band aids and tissue for tears – small price to pay for well-placed and unbent nails. And they may develop a good foundation for driving nails. I estimate that between them, they will have the opportunity to drive 700 or more nails with this project. Automatic success.
And when did making a paddle become a science? There is a blade design for every kind of water and boat shape/width. Not that I mind, I like upgraded and efficient “tools”.
I figured, since they will make their canoe, they can “make” their paddles too. Humm - not so sure if that plan will backfire and I have to “assist” i.e. takeover the shaping/planning part. I did make one for the son-in-law (cherry / cypress) since he is not involved in the build.
Alrighty, what can I do next while waiting on their arrival . . . .
At one of the CLC shop events I recall the presenter (John,maybe?) telling us about the hard life of a CNC router bit. They have to be ultra-sharp to give the high quality results that we’ve come to expect from CLC kits, especially cutting tight puzzle joints that self-align properly. 2 numbers stuck in my mind - $125 per bit and a 45 minute lifespan before they end up discarded as scrap metal. That ends up being $2.80 per minute routing cost, just for the bits. So that 20-minute job is now $56 dollars of cost added to the price of the boat.
That doesn’t include the electricity to run the CNC machine, the electricity to run the dust collector, the 1/3 of an hour for each machine’s maintenance reserve nor the labor for the employee operating the machinery. Since CLC is a business rather than a charity, they have to mark up those costs to cover overhead. I’m not privy to any of their numbers so I won’t guess, but it adds up quickly. Finally, when it’s all done, there’s the MD sales tax which increases the price of everything by 6%.
That simple 20-minute job of drilling a few holes can add enough cost to easily make the price of the kit unattractive to many customers. And it’s only going to get worse as tariffs and their resultant inflation kick in.
So letting the customers drill their own mostly optional holes could be the difference between selling kits and staying in business or pricing the kits out of the reach of customers in a tight economy.
HI Laszlo,
You are preaching to the choir my friend – I know all too well about the assorted intricacies of setting a cost for “machine time”, CAD time and all of the other related expenses of shop overhead. I know and agree that they (CLC) are not a charity or a “not for profit” and the primary focus is to generate a profit and spread it around. I am for that mindset.
I entered the CAD/CAM and CNC world in 1997 and have worked in several CAD programs and have programmed (Numerical Code) and operated several different CNC routers. I am well familiar with the limits and potentials of a typical router. I do not know what type of machine they use but I suspect it is a 3 axis of industrial quality – maybe overkill for the sheet goods that they machine. BUT, I for one like to have “more than minimum” and in this case I am not being critical their choices. I like the CNC world.
We are talking about a .0625 (1/16) pilot hole in a kit that is suggested or recommended for first timer and group builds. I said early on that subject, we would not need this feature on our projects but for the intended first-time users on this kit, it would be very helpful. It seems the entire premise of this particular kit is for the novice (my grandkids). These pilot holes are easy to draw and program. And sad to say, but if they are like too many shops today, they waste more than the 20+ minutes of machining while they are playing on their phones – ugh.
The comment regarding the price and life span of an endmill puzzles me. If the lifespan of their endmills is as short as you/they say, then something is wrong somewhere. Quality of the endmill, feed rate or spindle speed are considerations to be addressed if you are having premature wear. I have never had an endmill “wear out” even when cutting 8/4 hard maple or hickory on a job. Or maybe they are accounting for a new unused end mill on every job – I have done that on particular jobs and it is an acceptable practice to ensure very accurate machining on particular parts.
I do not know todays endmill prices but I would feel confident that you could spend the $125. and get a .625 (5/8) 2 flute uncoated endmill for that money. The .0625 (1/16) 2 flute uncoated end mill for the peck drill pilot hole should cost around $11. And the prices should be cheaper for a business with repeatable and large quantity purchases. A quality endmill should work for several jobs before needing disposal. Do you or I use a drill bit 2 or 3 times in wood and then toss it? You might need to reevaluate the surmised cost of these proposed pilot holes. Strike that, this would be a task for whatever CLC committee assigns shop or machine rates.
In the end, none of this really matters to me; it was a suggestion. I will not be building another Peace Canoe – a good chance something else down the road; I am still pondering the Pocketship (wait a minute, it’s got pilot holes for the stitch and glue wire – can’t be too hard as the process is already being done on many other kits)
The bottom line is that this pilot hole “suggestion” on the Peace Canoe would make assembly for the first time novice or group of builders so much better.
Grandpa (Dave)! Thanks for sharing the photo of the finished product in use. ‘Sounds like it was a great experience for everyone. ‘Looking forward to working with you on the Noseblock for my Mill Creek. ‘Glad to know ya!
TA DA !! The kit is now a boat. The Peace Canoe is finished and it floats without leaks and the maiden voyage was a huge success without incident – no pirates or alligators encountered; ahhh!
The kiddos had a good time and remained enthusiastic throughout the four-day build – Grandpa was delighted.
We endured zero hammered fingers and no tears or Band-Aids during the entire build. Aside from a few bent nails (rapidly removed), every assembly stage went well. They each glued, hammered, sanded and painted without complaint.
I lost count of how many paddling adventures we HAD to go on after the canoe was finished. I could not wear them out and there was almost a mutiny whenever it was time to end the excursion for the day.
They are proud of their work and might turn into mariners yet. Who knows, they might be pondering a kayak each in a few years.