After throwing in the towel back in November I am once again trying to finish my boat. I’ve moved the smaller parts indoors to get a head start. My office/den can be closed off from the rest of the house and has its own HVAC so it makes a good paint studio. I only wish I could get the whole boat in there.
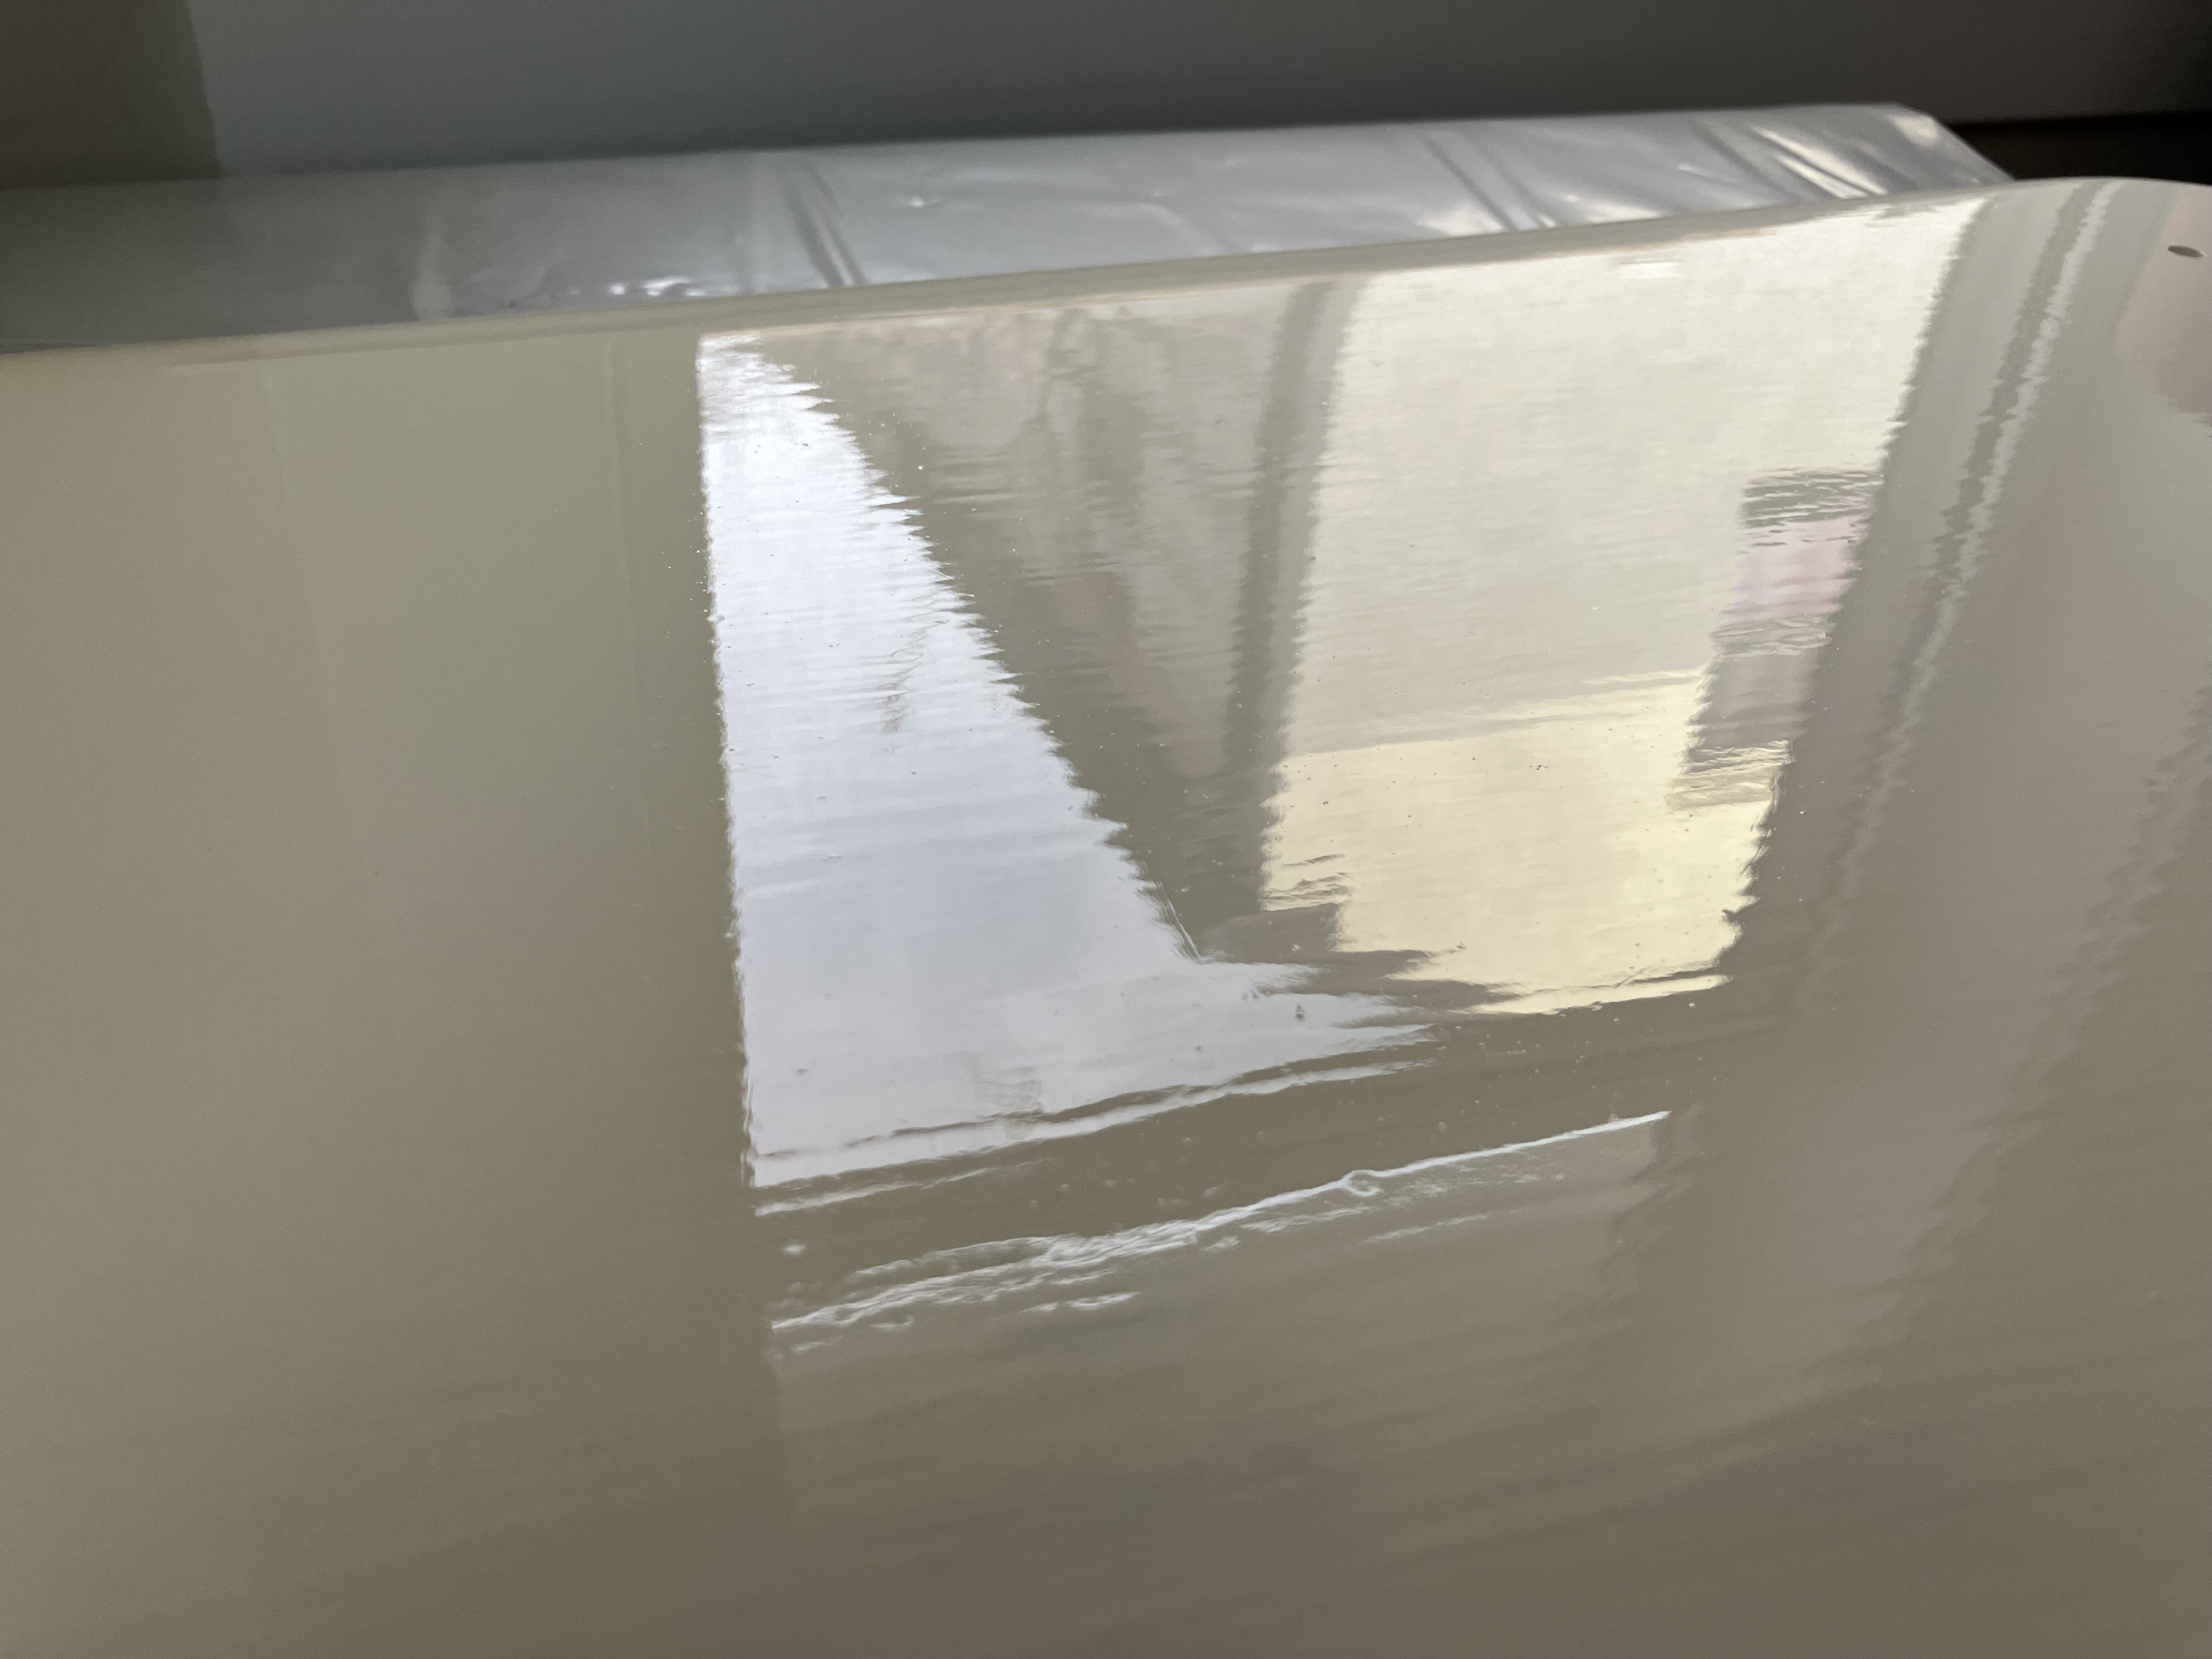
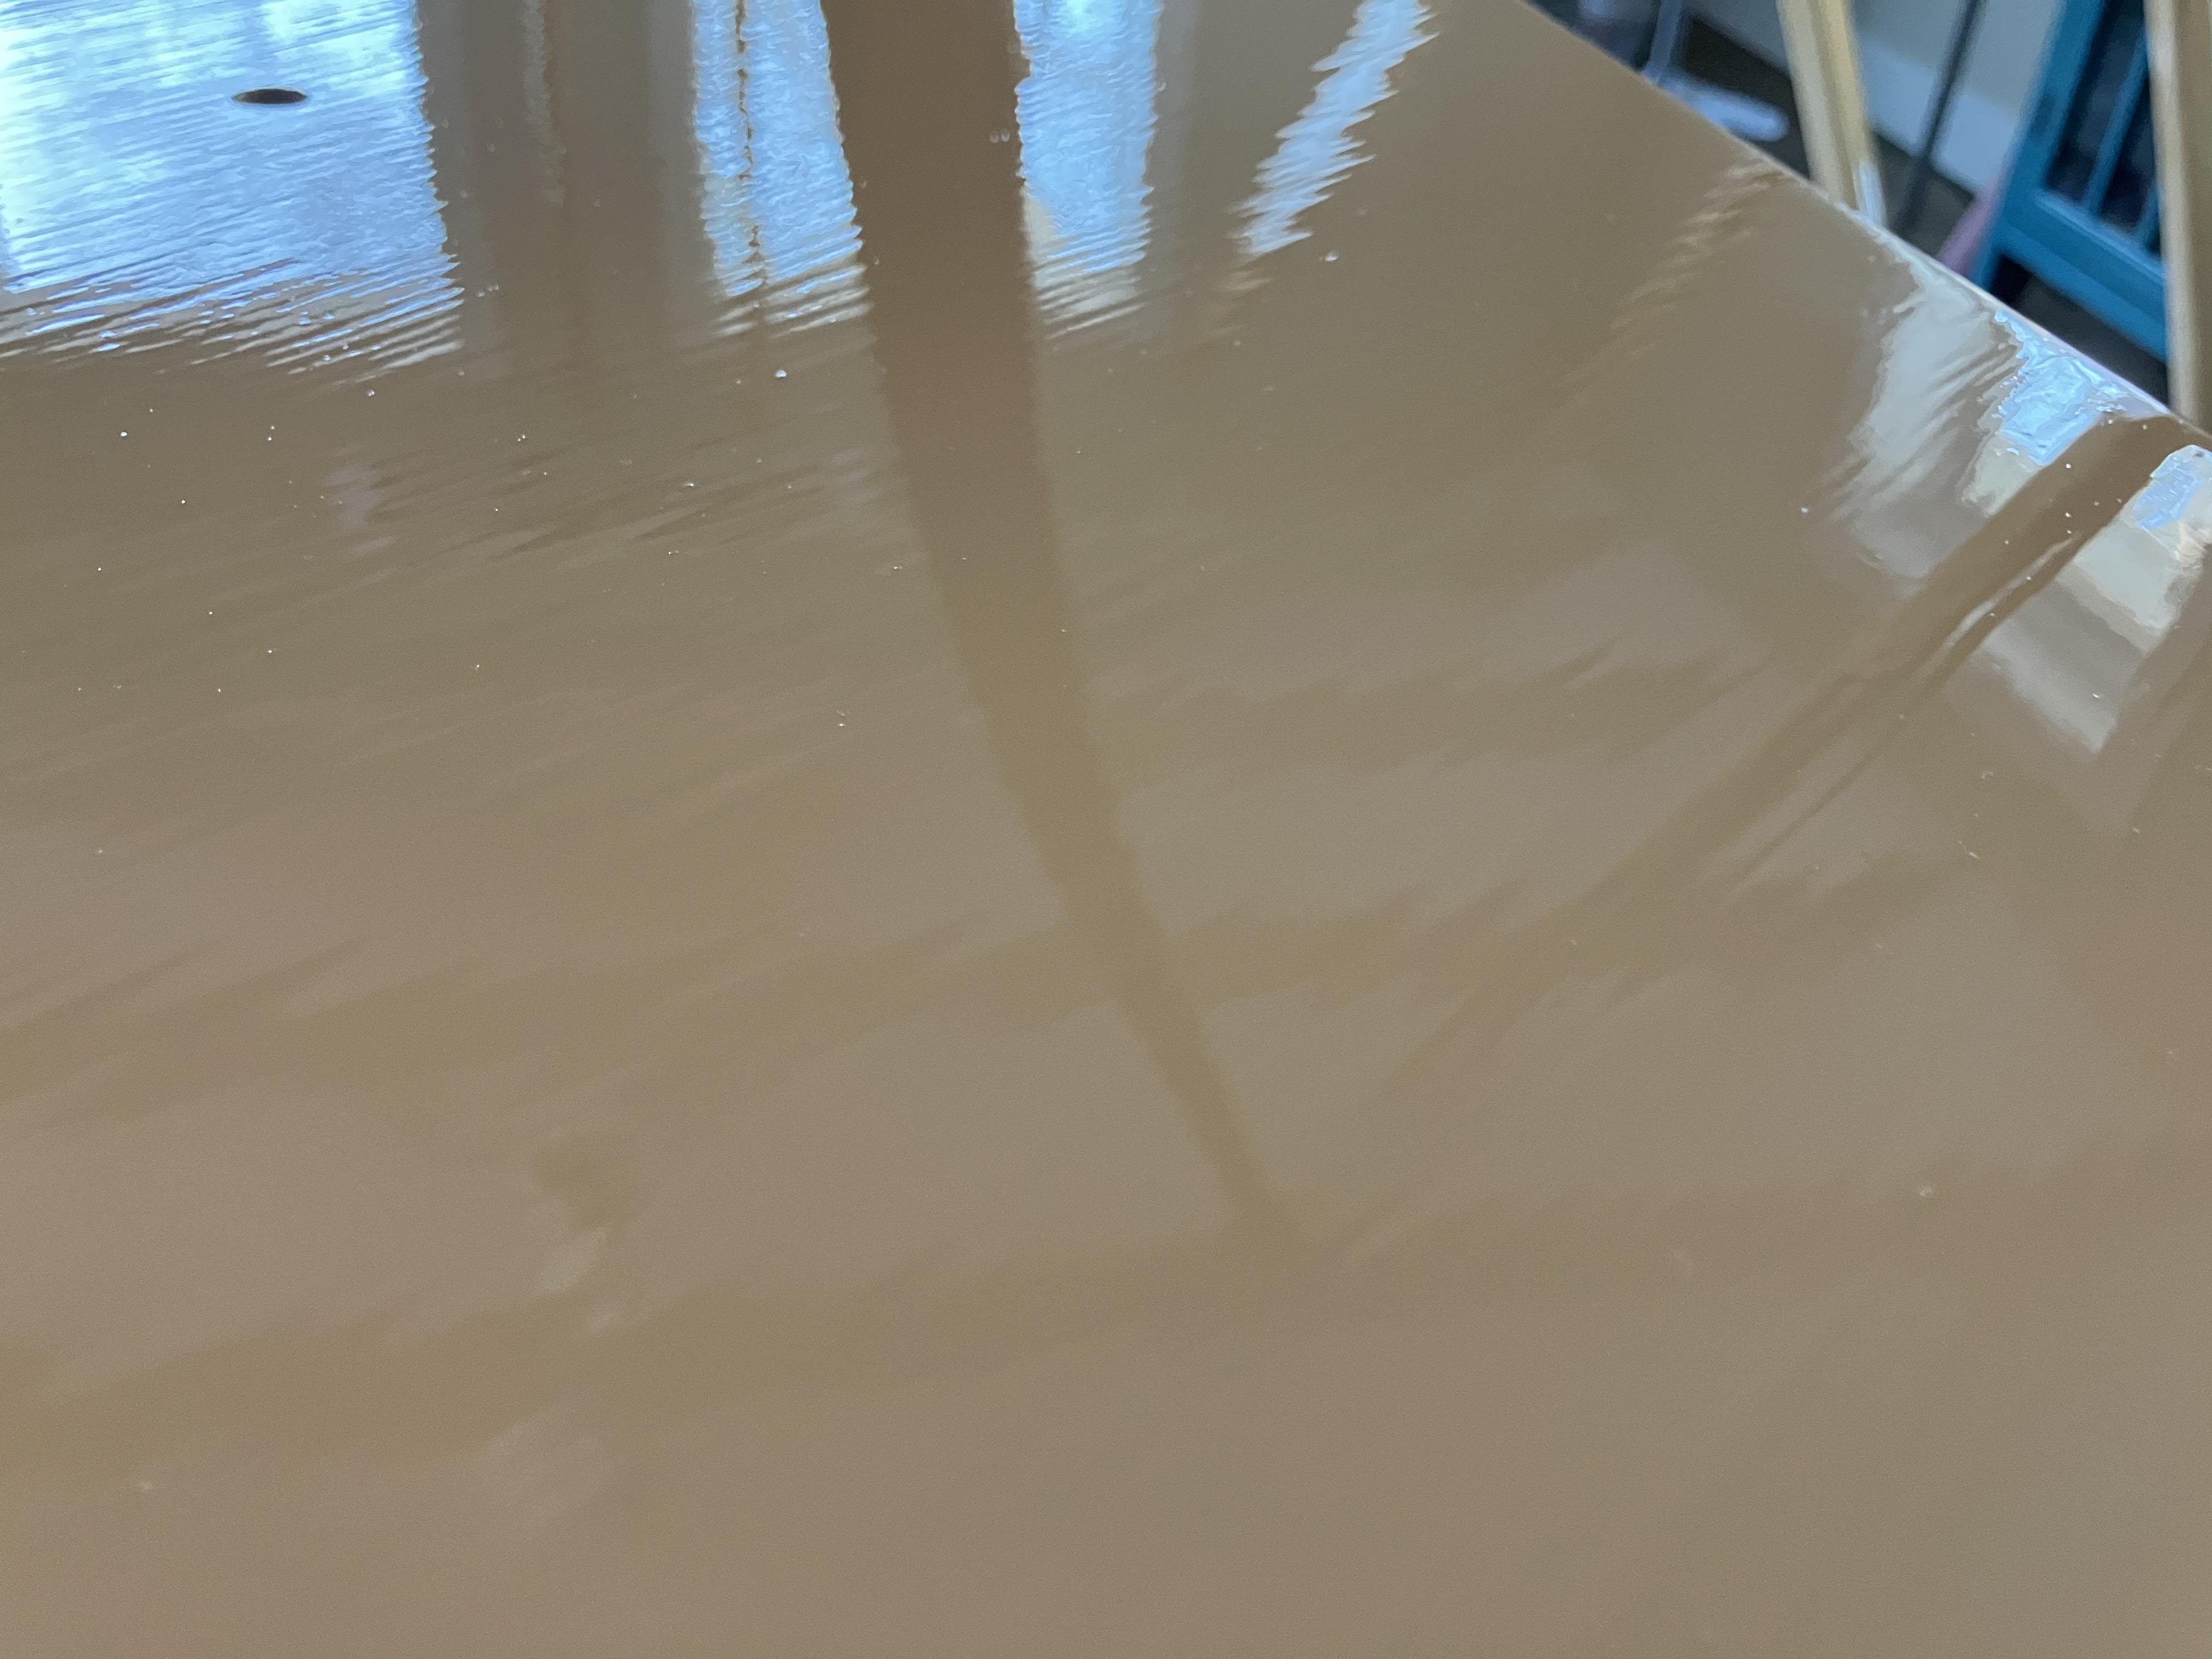
Anyway this time I tried tipping with a foam brush instead of just rolling and the results were possibly worse. Paint had been mixed for several minutes, and I did put it on as lightly as I could. The roller was never heavy and only left sponge marks unless I thoroughly rolled it out. I tried a new bush, and one softened with a small amount of paint. I am willing to consider that I may still be applying too much paint and will try to go even lighter on the next coat, though I am not sure how. I will also try a real paint brush instead of foam, but I hate to throw away expensive brushes almost as much as I hate to use awful chemicals to clean them.
I’m also willing to lower my standards slightly. I know I will never get an automotive finish, but I do feel it should be better than what I am seeing. Hopefully I can work it out on the small parts before tackling the hull again. I’ve already sanded off half of the paint I’ve put on. I will probably have to buy more paint in order to get the job done as is, so I am about out of attempts to get it right.
Note the paint had not dried yet in the photos. It is now a couple hours later and the finish is unchanged. Varnished parts for contrast because I used the same brand and size of brushes an hour or so earlier.
Can you refresh my memory on what type of roller you are using, how big a section you are rolling before tipping, and how much pressure you are applying while tipping with the brush. I assume you are painting in very small sections, tipping from dry to wet over just the most recently painted section, and tipping just once. From your pictures it looks to me like your paint is too think and you are applying too much brush pressure. Here is a good video but YouTube is full of ones that might help https://youtu.be/ixXcjv5JRaU?si=vdFy0GuQsxc-EE1X
How many sq ft are you covering with each oz of paint. I am currently in the process of painting the deck of a 14’ kayak that has a beam of 20” and need about 4oz of paint for each coat (I have no clue how many square feet that is and only offer it as a very rough guide). I am using the 4” white foam rollers from Home Depot. Compared to the CLC gray or the West System yellow foam rollers these have a very dense surface.
The photos also seem to show small bits of dust. Are you vacuuming the surface well? Did you change your clothes between sanding and painting? Are you always filtering your paint?
Thanks for responding… I’m only going to get this done with the support of this forum.
I am using CLC foam rollers cut in half. I may switch back to an all foam roller that doesn’t need to be cut. I fear debris from cutting, try as I may to clean it off. is getting into the paint. On this latest attempt I am only painting small parts. Rudder blade, center board, hatch covers, rudder case. So by default I am only covering small sections at a time. No larger that I would on the hull though. I am tipping from dry to wet, and I may have tipped more than once in a few spots but that seems to have made no difference. It’s hard to convey how much pressure I am tipping with, but about as lightly as I can manage; I am holding the brush with a thumb and finger.
I don’t know how much paint I am using per coat. I’ll see if I can get a decent measurement on that.
I noticed the dust after the fact as well. The room I am painting in has never been used for sanding or cutting, and I hadn’t done any sanding or cutting prior. I was wearing clean clothes. I vacuumed and used a tack cloth on all surfaces. There is forced air heat and likely a bit of air movement. I can try to minimize that. The varnished pieces are nearly dust free though, or no more than I can reasonably control for anyway.
Looking back, I should have stopped as soon as I noticed the paint was not flowing at all, but I was hoping that it just needed more time. These were partial quarts that had been stored in the can and the can sealed tightly inside of a plastic bag. I fear some solvent was still lost. Also, I had used an old roller handle that had some dried paint. I think it is possible paint from the roller handle and/or the can got distributed across the surfaces. When I start again after sanding these parts I will use fresh paint and supplies and do a test piece until I feel it is looking right. I should have been doing test pieces all along, but with my limited time to work I always feel like I have to get as much done as possible with the hours I have.
Edit to add that I said the opposite of how I was actuating tipping. I did exactly as shown in the linked video tipping back in to the previously painted section.
I think the CLC rollers are too porous for paint (IMHO). Try some of the white “hot dog” rollers from HD
Two more things. How warm is the room in which you are painting? I try to paint when the room is in the mid 60s. Takes longer to cure but gives more time for the coat to even out. Also, have your tried thinning your paint say 5 or 10%. It makes the paint more likely to run but also allows the paint to flow smoothly.
Finally, the stop loss bags that CLC sells are well worth the money. I personally always use them for topside paint and varnish as they prevent solvent loss, allow the dispensing of small amounts of paint with no mess, and totally eliminate the skimming problem. Even with these I still always filter using one of these filters Amazon.com: TCP Global - 190 Micron Filter Tips Ultra-Fine Paint Strainer (50 Pack) - Pure Blue Nylon Mesh Cone Strainer - Paint Filter Cones for Auto, House & Hobby : Tools & Home Improvement
1 Like
What type of paint? Roll on only with Toplac. Old paint could be an issue. I use a pump up bug sprayer with water to wet the floor down where I’m working, even from the entry points to exits and working areas Also, spray your pants legs and shoes . A shower cap for your head is a good idea too. As soon as you finish painting leave the area don’t keep walking around looking for imperfections it’s too late anyway and you’ll just stir up more dust.
The biggest improvement you will see is after the 3rd or 4th coat when you need to wet sand with 400 grit, it will change everything. The next one or two coats will go on much smoother. Good lighting is a must, light stands help. But at the end of the day you’re not in a spray booth with a spray rig. Don’t try for that brand new Corvette finish. Good luck and remember a good paint job is just a coat away.
1 Like
Ditto to all comments above. And your paint job doesn’t look all that bad anyway, especially from 10 ft. away and when you remove the shiny lighting. To me it looks like the major culprit is that the paint needs some thinning prior to application. Use “approved” thinners recommended by your paint manufacturer (yes, they are more expensive). They will help keep the volatility right. You don’t want stuff that causes the paint to dry too quickly - it needs time to flow. It is correct to ensure your foam brush is initially wet when tipping, and after your initial wetting you shouldn’t need to re-dip it. As you said, tip very lightly, as soon as possible after rolling out a section of paint. Maybe everytime you complete an area about 2’ by 2’ rolled out, then tip. Tip back to the “wet edge” - that is in the direction of previously applied paint and very gently lift the brush at the end of the stroke - just as you reach the previously applied paint. If the foam brush begins to vibrate, you need to figure out what it takes to stop that - it should glide smoothly when things are going correctly. A good quality, very soft bristly brush will often work equally as good for tipping, maybe even better. Badger hair is the gold standard, but too pricey for me, and I’ve usually been able to make do with foam brushes to prevent all the effort of cleaning expensive hair brushes. But if you have trouble with the foam brush you might try a soft bristle brush. Using the widest brush you can manage based on the geometry of the piece you are working on will help to minimize the number of brush-stroke lines that develop - however minor the lines might be, the fewer the better. And the comment about subsequent coats is true, the paint will like it best and behave better when it is going over previous coats, sanded with something 320 grit or smoother. In the final few coats, if you’ve already achieve a flat-level surface, you can even use something like white or grey (less aggressive) scotch brite pads - they scuff the surface nicely and seem quicker to use that sandpaper, especially on any curved or intricate surfaces.
1 Like
Thanks so much for the advice, I will certainly use it!
I have the thinner that Interlux wants with Toplac Plus and will experiment with using it. It has always been fairly warm when I have been painting. Probably mid 70s in the garage and in the current space. It does feel like the paint stiffens right up and doesn’t like to flow. I’ll keep trying the foam brushes on a test piece until I am sure they won’t work and then switch to hair brushes if I have to. I have a couple dozen of the foam variety so hopefully I can use them up.
I actually have some stop loss bags I haven’t used. I will use them when I open fresh cans, and order some filters for the partial quarts I have before using that paint again.
I’ll try the bug sprayer when I am back in the shop working on the hull, that sounds like a good idea.
The paint does actually look decent from most angles under normal light, but I think it can get much better.
Definitely try thinning at say 5% and then 10% given that you are painting in a mid 70 degree room
I didn’t get to do any painting over the weekend, but I did get another coat of varnish on my spars and tiller extension. I had been getting fairly deep ridges in the varnish as well, though not as visible at any angle compared to the painted surfaces. I thinned the varnish <5% with 333 Brushing Liquid (I have 2333 for the paint) and I’m seeing much better results.
There are 2 coats of epoxy and 2 coats of varnish on the spars so far. I’m hoping I can do just one more coat of varnish. At the speed I am progressing it is going to take a couple more months to paint and varnish the whole boat.
I personally find varnishing round spars successfully really hard so don’t beat yourself up too much. A comment and a thought. First, 3 coats of varnish is not really enough. Second, there is an option for varnishing spars that I sometimes use based on a technique I learned varnishing custom furniture. The basically idea is to thin the varnish 15 to 20% and apply with a microfiber cloth instead of a brush. The idea is to wet out the cloth and wipe the spar in a continuous pass from one end to another. After it dries, repeat the process. Obviously such an approach will require even more coats but I find that the techniques is easier and less prone to runs. Needless to say, the cloth must be stored in air tight (glass with metal lid) container between coats
Here is an article describing the process. It behind a paywall but you might be able to read one article for free. The author’s process is overly complicated IMHO. Wiping Varnish | Small Boats
Thanks, I can see that method working quite well, even if it does take longer. It is such a challenge getting the spars coated smoothly all the way around. Coating them in epoxy was just as much of a challenge; I had terrible runs and sags to sand out. I didn’t want to put screws in the ends and use the rotisserie method, so I have been suspending one end from the rafters and resting the other end on a piece of plastic or small support. It requires a little touchup, and I am not sure how I will handle the final coat. I’ll plan on at least 5 coats if I try the wiping method.