My dad and I got started on a Chesapeake 16LT this week. There are a few alignment issues that we have to sort out before we start gluing. Overall it's gone pretty smooth.
There are a few minor issues I have with the plans. For example the plans provide measurements for the beam, but it would be nice if measurements were provided for the spreader stick as well. Also, we ran out of wire about 1 foot shy of the stern during stitching. This happened while following recommended practices of cutting the wire bundles into thirds and stitching every 4 inches. Annoying to say the least.
I might get around to posting a photo or two later.
--jaydillyo
Jay
I had the same quandry about the length of the center-section spreader stick, I think I got my dimensions from auto-cad. But if you take the beam, subtract 2 inches (for the plywood and sheer clamps), you'll be pretty good. I put a slight angle on mine to match the shear clamp angles and then drilled from the outside into the beam, then drove a small nail to hold everything in place. Was easy to remove later by cutting the beam in half, bending it off the nails and then pushing the nails back out. Left only a small (1/16th") hole.
I also ran out of wire, much earlier than 1 foot from the end (although I wasn't using a kit - just ordered my wire separately). I bought slightly thinner copper wire, which I had to strip the insulation from, and actually ran out of that, too. My last foot was held together with 1/8" zip ties. If I ever build another one I'm using zip ties all the way round. Much easier, and they don't break, like lots of my wire did.
Mine's a 17 LT (sort of - slightly larger) and it's been a fun project. I'm forming up a carbon fiber coaming now... not sure how well that's going.
Post pics as you go, would be great to see one take shape again.
Good luck, Larry
Ran into another minor issue today. The Chesapeake video states that the fillet spreading tool has a 2" radius. I'm pretty sure that he meant to say 2" diameter. Every other reference to the size of the fillet tool says a 1" radius.
These are all minor things, but they can be quite confusing during your first build. I didn't get much done today. Just flipped the boat and put the bulkheads in place. Tomorrow I'm going to do the interior filleting and glassing.
-- jaydillyo
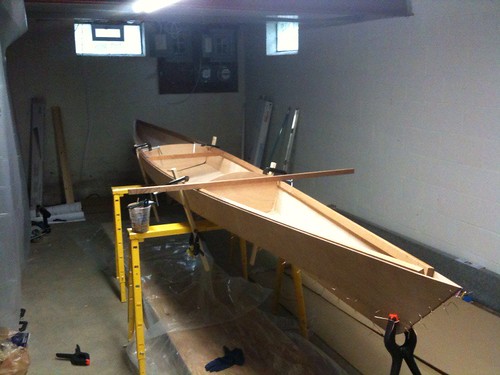
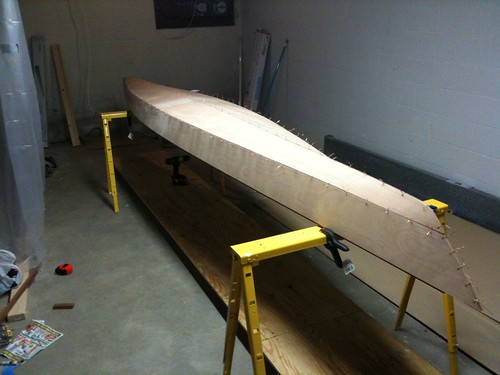
Here are a couple of pictures. The second picture is where I'm currently at.
Jay,
Looks awesome! I remember being there and being really excited that all those thin strips of plywood actually started looking like a boat.
I wouldn't get hung up on the size of the fillets..., mine were a mess... so bumpy you couldn't lay glass over them and I had to sand (i.e., grind) them down and redo them. In the end you want as small a fillet as possible but big enough for the 4oz glass to lay over/into. If you can fit a nickle into it, you're good.
What I would recommend is that you do the "tack" first, putting smudges of epoxy in between all those wires. After 24 hours you'll have enough glue in the seams that you can remove the wires and then put complete fillets in all the seams. This alleviates the need to sand (again, grind) down all that copper wire after your epoxy has cured. Just easier. Also, mix your epoxy THICK!!! In one cup of epoxy (hardner & resin) I remember putting 12 tablespoons of woodflower to get it to the thickness I wanted. Learned this the hard way, after wasting a cup of "thickened" glue that ran through all the seams of my boat. Big mess, big waste of expenseive epoxy. The test I use is if it'll run off of my mixing spoon/stick, it's too runny. Thicker glue is easier to work with too.
Today I layed 4 more layers of 6oz glass over my original 2 layers of 4oz for my coaming. Much, much better today. The first run had so many bumps I had to cut several out - but the extra layers of glass made everything disappear under the heft of the glass. If I get gutsy I'll put the carbon on tomorrow... haven't quite decided.
I've got a running storyline with pictures on my post (Chese 17 (LT Modified), if you're interested.
Good luck, and keep posting.
Larry
Jay,
I just realized, from your other posts, that you've built many of these boats. I feel foolish for offering what must seem like common knowledge advice to an otherwise experienced builder.
Still look forward to your build; hope I didn't insult your intellect with my builder's advice.
My 17LT is my first build; my next will be a Chese 14 for my wife.... Looking forward to that, too.
Larry
You must be mixing me up with someone else. The 16LT is my first build. I also have the plans for the Shearwater 17 which will be my next build. That boat will be for me. In the spring I plan on building a small center console skiff. I have a lot of boat building ahead of me. Loving it so far. :)
-- jaydillyo
Yes, you're right, I mixed you up with this post:
http://www.clcboats.com/forum/clcforum/thread/7374.html
Jayarbro and "Jaydillyo" looked awefully similar to me....
No worries, keep posting and enjoy the build,
Larry
Just got done tracking the panels together so I can remove the copper wire. I think I went a little overboard because I ended up with little fillets in between the wires. I think it'll be okay as I'll be going over them with a larger radius fillet tool after they are cured. I didn't end up tacking the stern because I ran out of goop and didn't want to mix up another batch. Oh well, that's the way it goes.
-- jaydillyo
My girlfriend and i did some work on the kayak today. We filleted and taped the seams in the bow and stern. It took a lot longer than i thought it would, but I guess that's ok. It seems to take a lot of brushing to get the epoxy to wet out the fiberglass tape.
We didn't do that neat of a job, but I'm okay with it since they are going to be hidden in the bow and stern compartments. Tomorrow we're going going to fillet and tape the cockpit compartment. I'm going to take the time to put down some masking tape around the seams for the fillets. I'm sure this will make a big difference.
-- jaydillyo
Jay,
You might want to pass on taping the cockpit seams... IIRC the manual calls for 4oz glass in the cockpit, which will cover your fillets and give you the same strength factor as taping... it's also easier to lay your glass out without having an extra layer of tape to go over (leaves air pockets along the edge of the tape). Just a thought. My 4oz went into the cockpit very smoothly, and I ran it about 2" over the bulkheads to preclude having to tape those (they're taped on the opposite sides, in the cargo areas).
I know what you mean about "didn't do that neat of a job," you get epoxy everywhere (it seams) and it looks a mess against the lighter plywood. I painted my cockpit and cargo holds with exterior oil-based paint, covered up the color differences and gave it a much cleaner look, even though you can still see the glass tape outlines.
Sounds like things are going fast/well,
Larry
Too late. I read your post last night right after we finished taping the seams in the cockpit. It's a good thing that I read your post though as we had completely forgotten to lay the fiberglass in the cockpit! We weren't very excited about having to go back and do more work, but we got it done and I think it turned out alright. I also ran the fiberglass up the bulkheads a little bit.
I did have some trouble with bubbles around the fillet tape. It took some patience, but I was able to get it to lay down pretty good, or at least make sure that there was enough epoxy to fill them. I ended up with one decent size bubble in the corner by my front bulkhead. That's the side that my girlfriend did! Don't tell her I said that though! :) I'm just going to inject some epoxy in there with a syringe and call it good.
I'll post a few pictures tonight.
-- jaydillyo
Jay, sounds like a great job. I wouldn't sweat the little pockets along the seam tape and cockpit glass, the double-glass reinforcement of the seam is probably overkill! As to the bubble in the corner, just grind it out later with a sander and fill it with "goo" next time you have some thickened epoxy left over. Make a little corner fillet. I also found it useful to use excess epoxy to fill the corner gaps between the bulkheads and the sheer clamps - both sides - those hard-to-reach areas where you know you didn't completely cover the wood with glue/glass. Pushing a corner fillet into each of those gives you the peace of mind that when your boat goes over and fills with water, the clamps and bulkhead wood will stay completely dry/protected. Just an observation I made while building.
Always a little extra epoxy left over, and always somewhere you can use it!
Look forward to the pics,
Larry
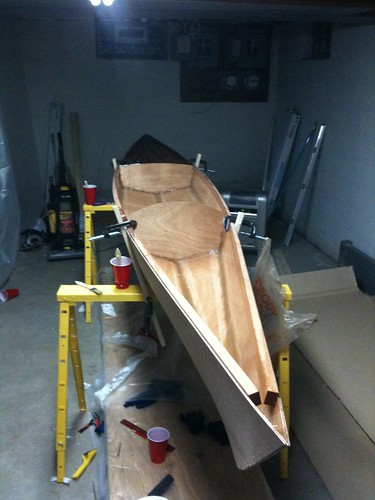
Here's a photo of the fillets in the cockpit.
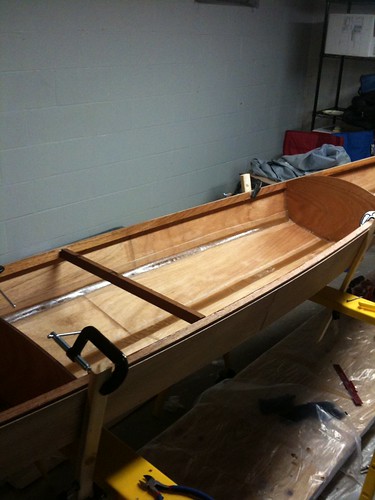
Here's a picture of the kayak as it sits. The cockpit is glassed and the entire interior had its second coat of epoxy applied. Not the greatest picture though.
-- jaydillyo
Your glass work/seams look a lot neater than mine did! Maybe that's why I painted my interior...??? Hid a lot of epoxy / flour spills and clean-ups.
Excellent work, will be a nice looking boat!
Larry
I would like to attach the deck to the hull w/o the use of nails, screws, or copper wire. Has anyone every done some other method of attaching the deck to the hull. As a first time builder, the blog is great and has given me lots to think about.
Hi Quickstart,
I'm sure somebody has attached the deck to a Chesapeake kayak without nails, but it would probably be a lot more difficult than using the nails. The deck pieces are pretty large and the nails keep everything from sliding out of position. The nails also do a really good job of clamping the deck while the epoxy is setting up. You would need a lot of cargo straps to be able to apply pressure so evenly.
There's also the issue of the unwanted dip that typically happens on the forward part of the Chesapeake deck. I did a test run attaching the deck to the hull with cargo straps and I was unable to apply enough pressure with the straps to remove the dip. However, when I did the actual installation, as I hammered in the nails, the dip popped out by itself and formed a nice, gentle curve like it's supposed to.
You also asked about sanding copper wire in a different post. It's pretty easy. First, trim the wire as close as possible to the wood, then you can use a sanding block or a random orbital sander to make it flush with the surface of the wood. I found the copper wire was a lot softer and easier to sand than I expected.
Hope this helps.
Mark
Quickstart,
I had the exact experience Mark describes, I couldn't eliminate those dips (front and back). Magically (it seems), they disappeared as I nailed toward each end.
One option, albeit no less unsightly than nails, is to use screws, which you could remove later. But you're still stuck with ugly holes that need filling....
Good luck with whichever option you choose and let us know how it goes,
Larry
If you scroll up a few messages and look at the last picture I posted you'll notice that the bow has a tiny bit of twist in it. The bow isn't perfectly perpendicular as it should be. I'm pretty sure that this is because after I aligned it I used a spring clamp to help keep the bottom and side panels aligned how I wanted them so they would be nice and flush. I actually didn't notice this in person, I noticed it in the picture and when I went back to look at the kayak, sure enough, it is twisted a bit.
It isn't off by much, but I'm still wondering how this will affect tracking. Any idea how to mitigate any problems would be appreciated. I'm sorta stuck with it this way as it has been glued together for a while.
--jaydillyo
YOu may be able to warm up the epoxy with a hair dryer and get it to soften enought to apply a counter twist. Then let it cool. I did that to a hatch cover that did not fit right. More difficult with a seam with fillets but with patience to let the heat penetrate you might beable to get it to work. Otherwise, figure out a way to force it into alighment and hold while adding the deck.. may be able to correct some of it. It doesn't look so bad in the picture so probably will not affect the performance.
Ed