Is there an issue with reduced strip length

Looking to purchase a CLC kayak kit and start building. Was surprised to find out that the strips available are only 6 - 7’ long, requiring multiple butt splices. My last dealing with strippers was 25 years ago when I built a Kipawa canoe. At that time, I got full length strips.

Checked other kit manufacturers (Bear Mountain, Newfound Woodworking, Noah’s) and they all provide full length strips. Is this a new thing at CLC. If not, can anyone that has built a kayak with the reduced length strips comment on how it looks when finished?

Lou

I have built 6 strip boats and two hybrids using CLC’s 6-8’ strips. The one and only advantage to building with full length strips is that you won’t have any butt joints. The disadvantages are that long strips are more expensive, harder and more expensive to ship, hard to work with and fragile, especially when using thinner strips. One other point is that with a full length strip you have to bevel both ends so if you make a mistake you have to start over.

The trick to using short strips is to be careful regarding color and wood grain when selecting strips to butt together. If you are selective, the butt joints are hardly noticeable. If you look closely at the first picture, you can see my butt joints just to the left of each piece of tape. My technique is to cut the joints on a 45. It gives more glueing area and makes it easier to fit. I find that the CLC strips come in bundles that are mostly cut from the same board, so easy to find a match.

The only exception to this is that I scarf the shorter strips together for a full length on the first strip on each side. That way the shear will have a nice smooth curve that you may not get with shorter strips.

ditto almost everything that Mark says with special emphasis of the need to typically scarf up one set of strips to a full length strip for your key reference line (shear line on most boats).

the one difference i have with mark is that i just go with straight scarf joints as i find it easier to get a clean (hard to see) joint. i have a jig in my belt sander that reliably/easily puts an 8 to 1 bevel on the end of the strip - sort of looks like a chissel blade) and then i glue it to the other strip to make my final length..

it’s also important with the joints to off-set them (similar to a wood flooring project) so the scarf lines don’t line up close to one another on adjacent strips.

i stain most of my boats and i have not paid too much attention to matching the strips - which is important if you are going natural. when stained…it becomes part of the art….having the difference in the strips…several pictures below….

fwiw, i can’t really imagine a longer boat and managing the problems of one piece strips per the comments mark made above. if i was doing anything long and wanted full length strips i probably would have to buy the boards and rip them at home….or have some way to really secure them in transport so they do not break. it would probably be a lot more work with all the extra care you would need to take..and you/your shop was really set up to handle them.

the other advantage on not using one piece is your wastage goes way down….i save all my pieces and get more boats out of the same amount of lumber than most folks becuase i don’t hesitate to scarf pieces together. once you get your scarfing approach down (and as mentioned i built a little jig for that) its very fast.

1 Like

Mark and Howard,

Thanks for the replies. Yes, it’s true dealing with long strips can be a bit of a challenge when hitting the curves in the canoe. I normally had to put a clamp at the end of the strip, give it a bit of a pre-twist and then get inventive in clamping! Mark, when you cut your 45 degrees, do you park and cut by hand, use a jig or use a fine tooth blade in a chop saw? Howard, you got me thinking regarding the sander creating the scarf joints. I might look at that. So far as the first strips, fortunately I still have a few full length strips from the canoe I built 25 years ago, so now they have a purpose.

When I did my canoe, I did it with a no staple method. (See pics) I notice that Schade staples. I guess if the butt joints don’t distract, the staple holes do not. I still have the parts needed to do the no staple method, just trying to see if it’s worth the effort.

When you get the 6 - 8 foot strips, are they just random colors or is there a specific attempt to create accent strips or specific patters at the top of the kayak?

Again, thanks for your help. I am sure I will have more questions for you and the group at large when I start building!

Lou

I can only embed on picture. Here is the pic of the canoe after a recent refurb.

Hi Lpiffer,

when you get the strips, you order/specify one of three ‘colors’. the “light” which is Alaskan Yellow cedar, the “middle” color which is western red cedar and the “dark” which is walnut.

within each of these species, you can get variation in terms of color, even when they are cut from a single underlying board.

so, for example, in the picture i sent you, alaskan yellow was used for the shear strip and the bow strip and everythign else is western red cedar. you can see that the western red cedar has a lot of shades. i am pretty sure that in Mark’s picture he is mixing yellow cedar with western red as well.

my experience is that the light and dark are relatively consistent but it’s the western red cedar that is all over the place with regard to shade and where you have to inspect carefully what you get or have a conversation with CLC as part of your order to see if they can be careful in what they send you.

the Alaskan yellow and Walnut are the most common accent colors becuase of their strong tone (white/yellow or dark brown and the ease of consistent color) western red is where most people do their fill work….and depending on how consistent they want that, then they obsess appropriately on board selection and color matching.

fwiw, all of the boat pictures i sent i used staples. i am pretty careful to fill the holes to minimize how they appear….staining ….in my boats also impacts how they stand out or don’t. at the end, its really an artistic, labor effort decision how you approach it.

here is some more detail on my scarf jig….not a real big effort :slight_smile:

Howard,

I really like that color scheme on the boat that has the light color deck and darker red body/bottom wood. How did you prevent the stain from bleeding out to the main shear strip. Also, for the bow strip forgive me if I am still using canoe terminology, but is that the outer stem? Were you able to have CLC get you a bit of the same Alaskan yellow to enable you to match it?

Lou

Hi Lou,

thanks for your nice words.

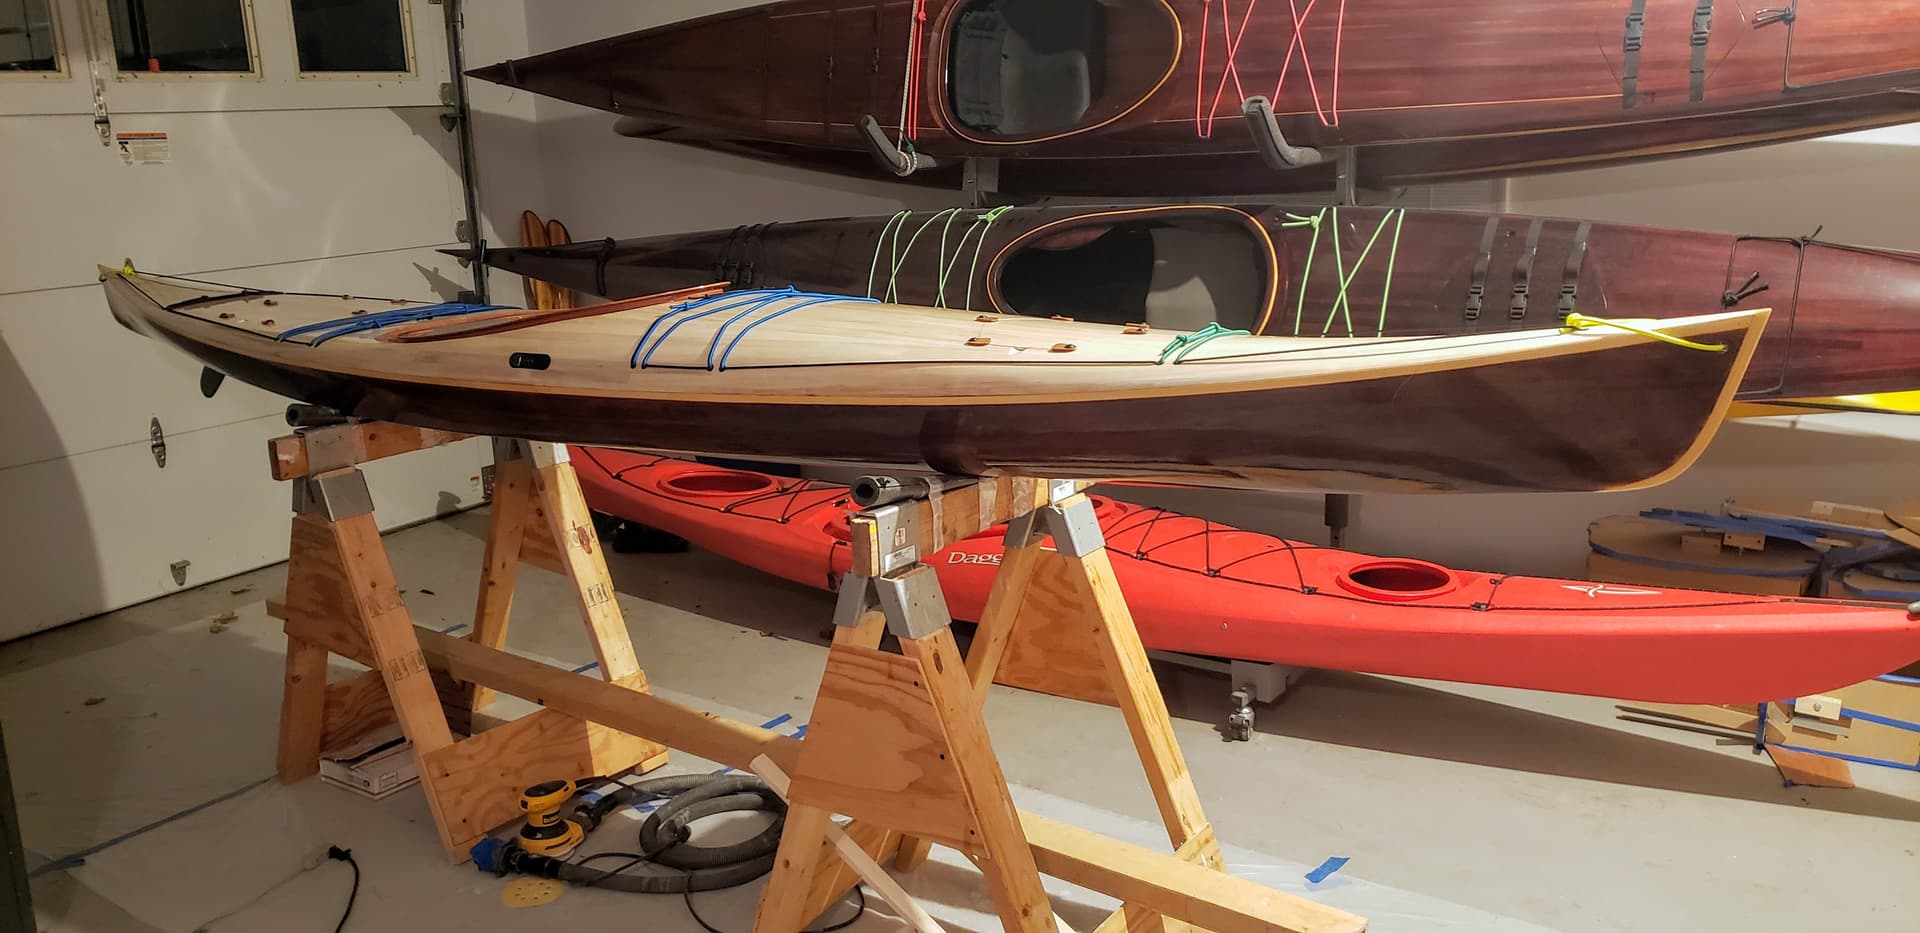
on the boat with the light deck….and in answer to your questions…..

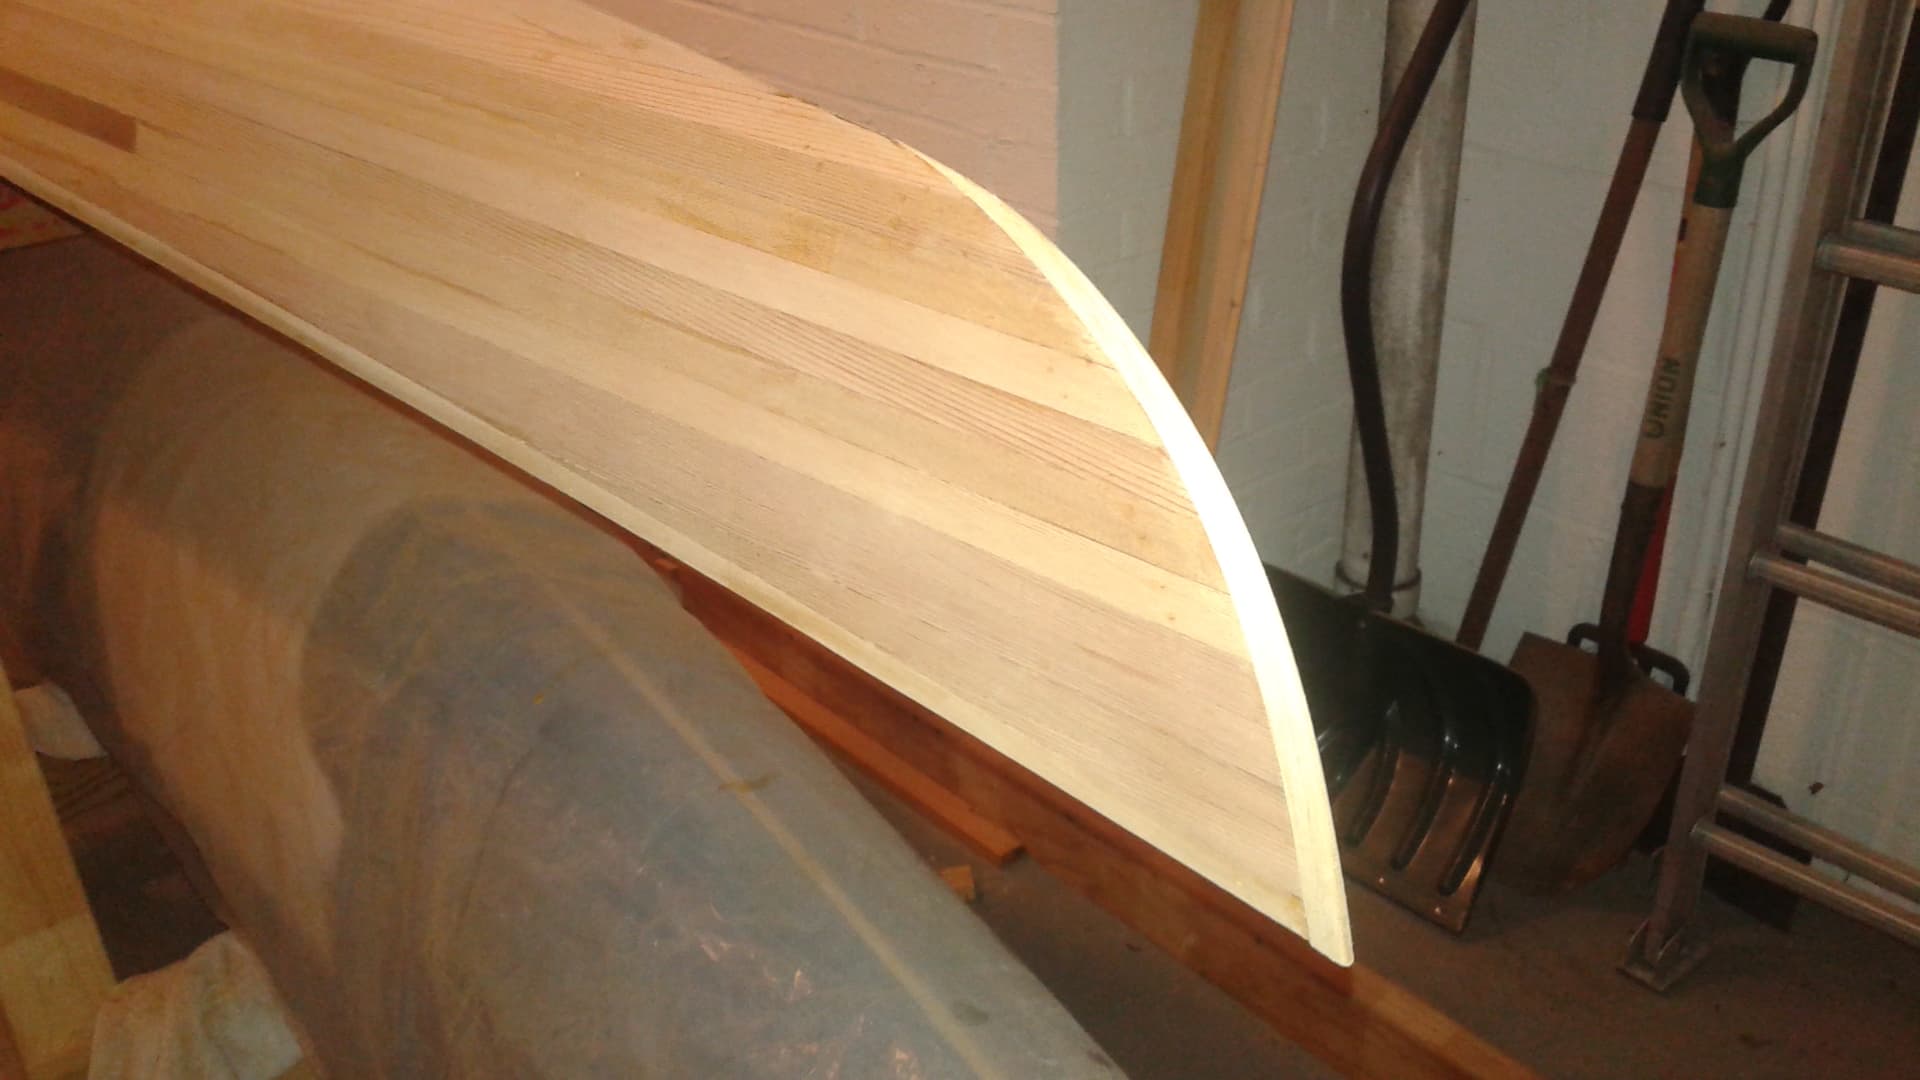
the bow strips (outer stem) and the shear strip that is yellowish in color is alaskan yellow cedar. as mentioned, it tends to be very consistent in color. this is its natural color and i had no trouble with what they provided me being this very consistent light yellow…..but you can always ask. it’s the red cedar, as mentioned above, that is all over the place with regard to color.

this particular boat happens to be stripped with a wood called paulownia….which is a bit like balsa wood so the entire boat you see only weighs about 27 lbs. and both the deck and hull are stained. the hull is a dark brown (Mohawk Bown Maple) and the deck white #25 Mixol colorant mixed with denatured alcohol.

there are two techniques i use to keep the stains from bleeding onto the accent strip and they each have their plus/minuses.

first, in both these techniques, the stain is applied prior to joining the hull and the deck.

technique number one is to carfully mask off the accent stripe and stain the hull. in this technique, i first mask the non accent strip parts of the hull and put epoxy onto the accent strip to seal it. then i reverse the masking (hide the expoxied accent strip) and stain the rest of the hull being careful to use a ‘dry’ rag as i get close to the accent strip (vs a dripping wet rag). then there is a quick coat of epoxy from a roller to fix the dark stain in place prior to pulling the tape off of the accent strip. carefully clean up any bleed through (color that got on the accent line) with a piece of sandpaper. then glass the hull. this technique works fine with some practice and you can get sharp lines and its probably the simplest from a consruction perspective.

the second technique is to build the hull without the accent strip, stain it and lock it in with epoxy, then glass the hull, and then add the accent strip and then final glass. (on a kayak the final glass would be the inner seam and the outer seam. this seam glass would cover the previously not glassed accent strip. a layer of glass would go over the stems and fairand you would fare that layer into the hull glass.

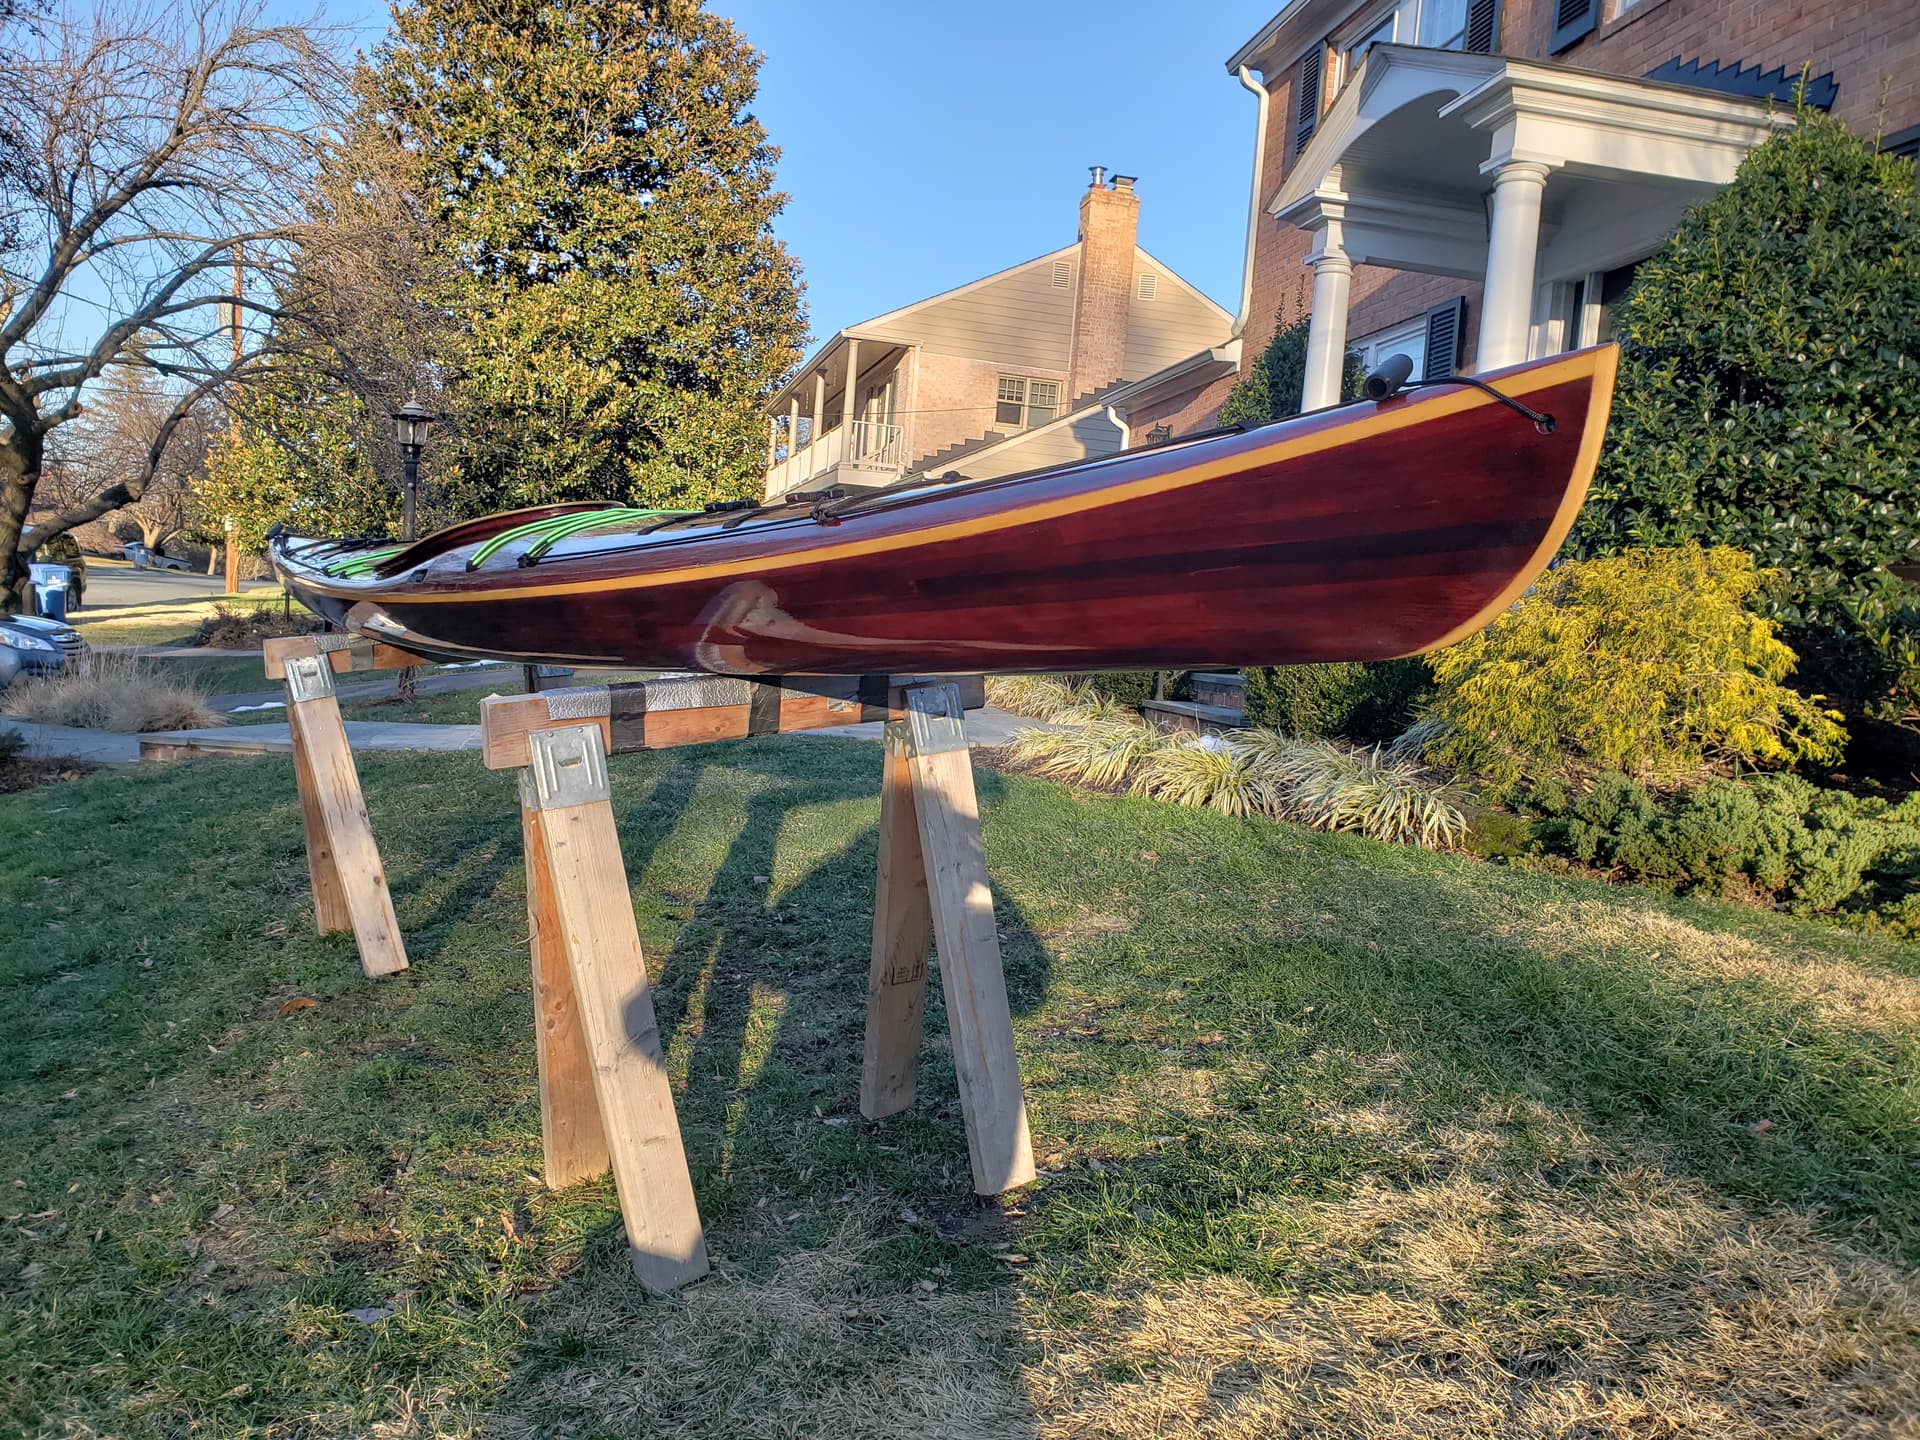
the second technique can only really be used when the accent strip is the shear strip and/or the outer stems. if you have an accent strip else where (like the redish boat in my pictures that has a waterline accent), you have to use the masking.

the second technique is a bit more of a pain from a construction perspective but offers the sharpest lines. that said, if you do the first technique well, you would have to look very carefully to see the difference.

the other thing you need to be careful about when staining is you have to get all your sanding/faring done in advance and make sure everything lines up. once you start assembling and get to your final sanding, you have to avoid ‘sanding through’ your fiberglass layer through the stained layer and into the underlying wood….such that you need to restain. it can be very challenging to fix it up sand throughs.

sanding through is not a problem with no-stain-boat and just using different color woods.

i hope this was helpful.

h

I haven’t had to deal with this but in a recent episode of the Art of Boat Building:

https://youtu.be/r4dj-0xwqDo?si=YZflbwTOWBKc45Og

Starting around 6:40 he describes a method using edge banding.