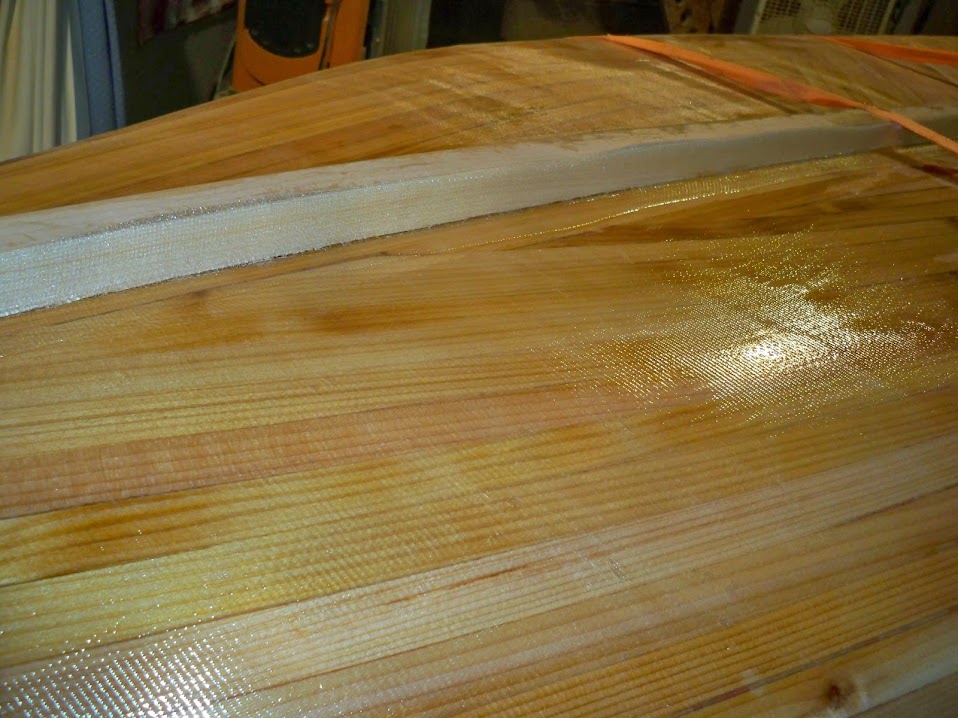
Well two hrs. to mix 6 double batches and wet them through and squeegee them through to get the first sheet on diagonally, the small off cuts will fill the small section not covered.
I'm glad I did not try to cover the keel; I would have never got it tight, doing that w/ glass tape after the bottom is complete will be much better.

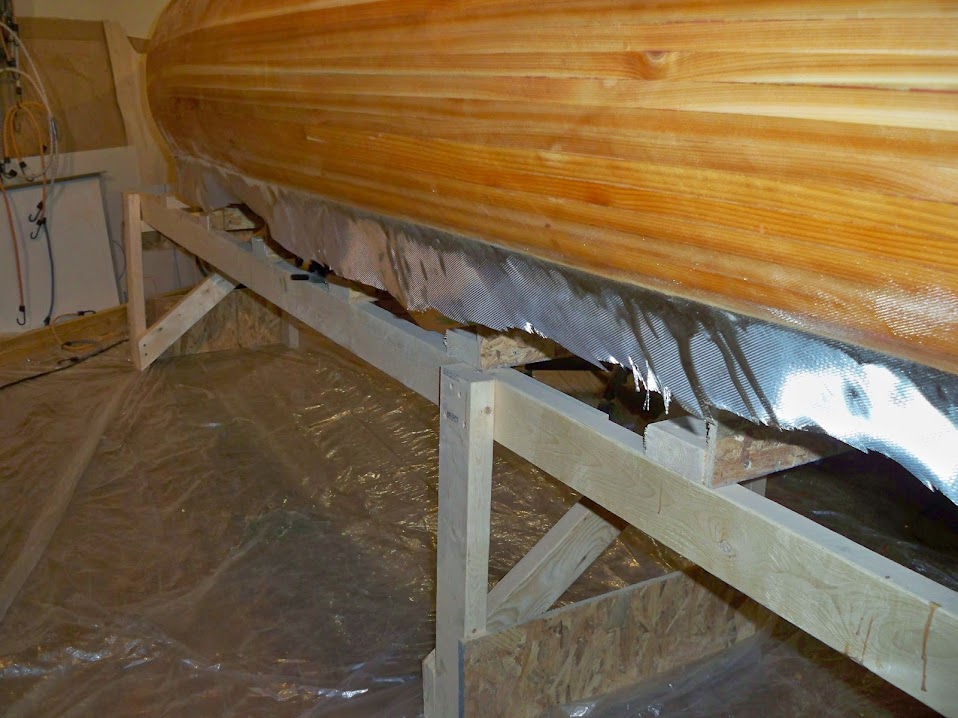


I stayed up and finished the first layer.


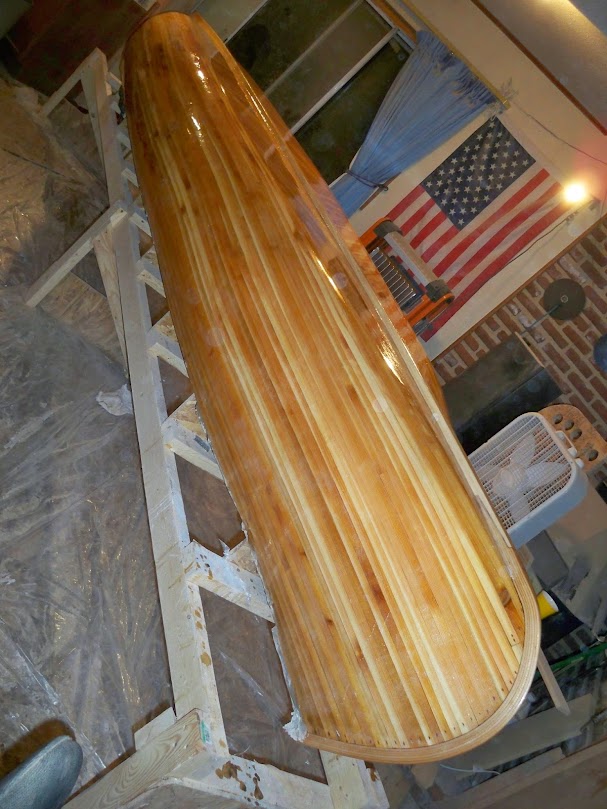
Well the hull now has two layers of glass and has cured; I'm happy w/ the way it went down, theres a few places to address but over all looks great.
I'm prepping for the keel and more resin, and think as more resin fills the weve it's going to look stunning.
Bruce
looks pretty stunning already, Bruce. Keep posting the pictures!
Gero
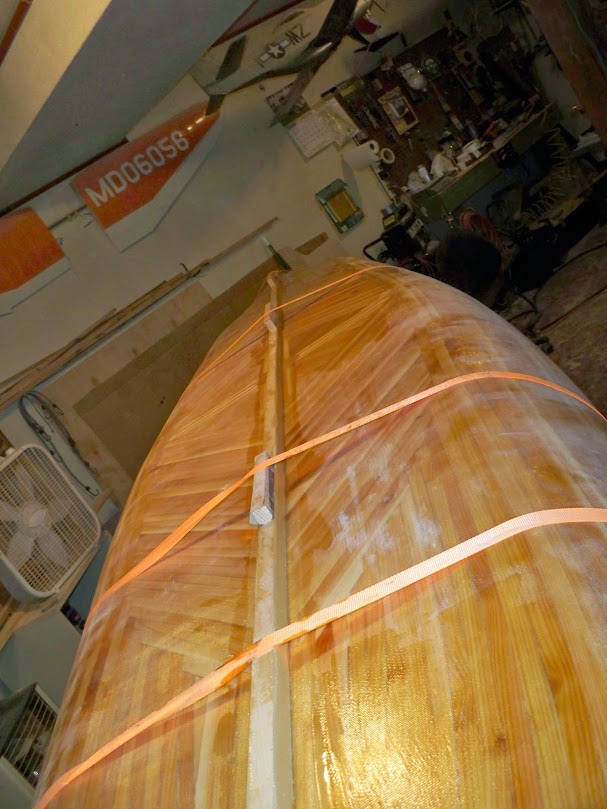
Thanks agan Gero.... I've made and fit the Keel; I'm going to glue it to the bottom w/ resin and 1 1/2" glass strips down each side clamping it tight w/ ratchet straps and two screw at the stem ends until it cures.
Do you boat experts think that will be strong enough or should I still add
1" stainless screws when I get to the inside? and then cover them w/ glass& resin.
Bruce


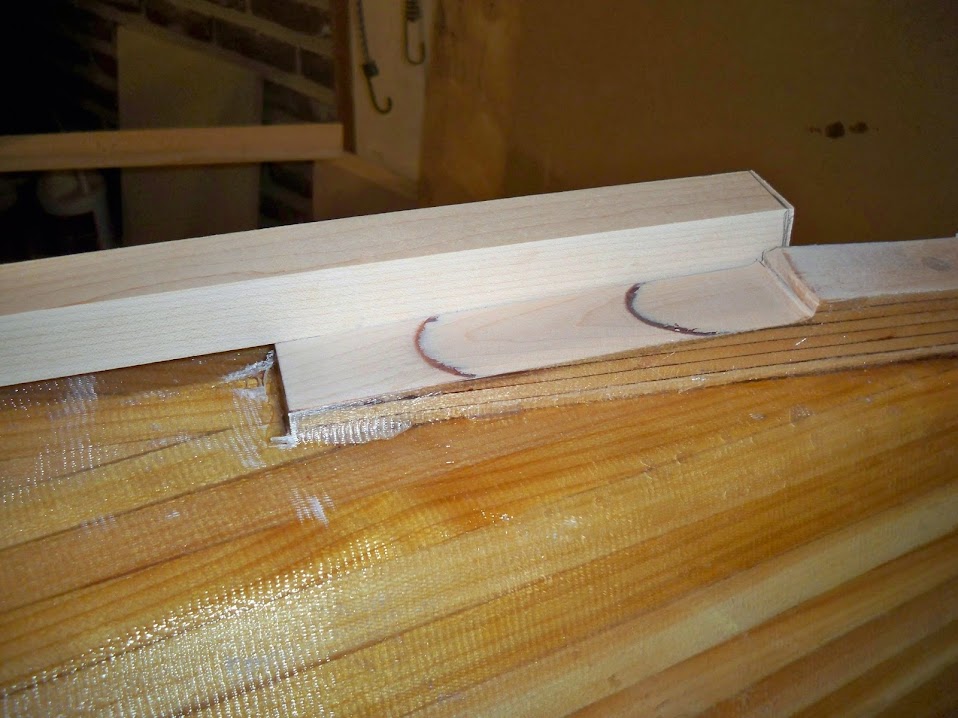


I think you’re going to find that glass cloth does not like 90 degree corners without a fillet .
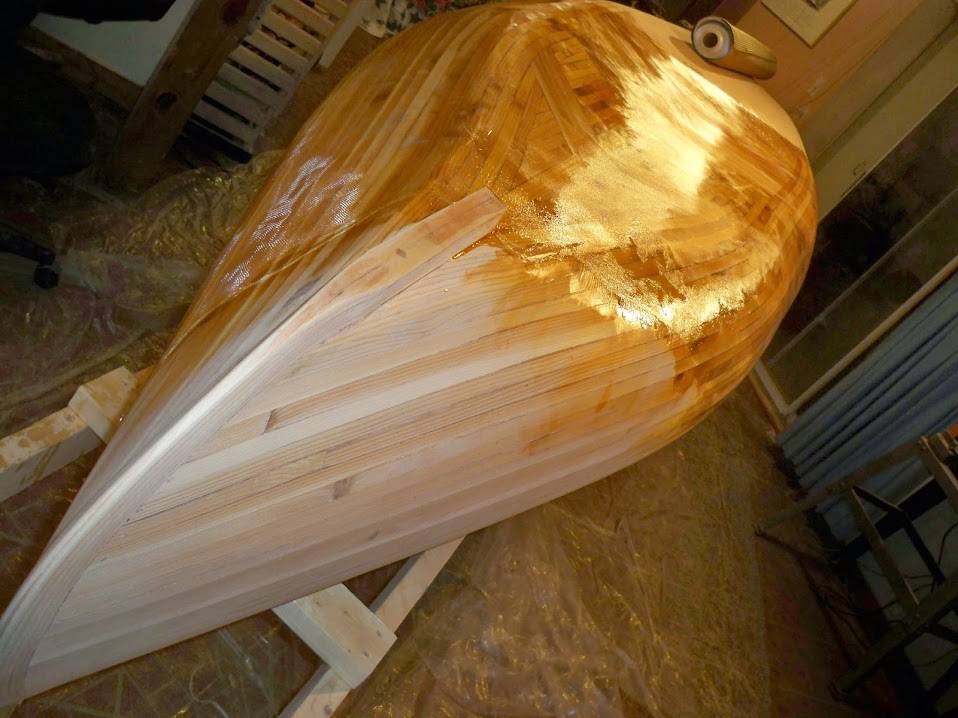
Well sand out the two layers of glass and added the first fill coat; that's 1 1/2 Gal.
of epoxy resin I have more on the way, it shipped today.
There's quite a few people that have trouble w/ this resin; It has to be how there mixing it, I've had no troubles at all.
You really need to watch there videos; and stir very well w/ a 2 to 1 ratio ONLY!!
Unlike other epoxies and fiberglass resins adding more catalyst does NOT make it set faster; it just gets rubbery.
I had a few bubbles under the second layer so I cut them out w/ a blade and sanded; most of the day was spent sanding, I put the fill coat on in 1 1/2 hrs spreading it w/ a brush and plastic squeegee.
Check it out,


Well while waiting for the resin to get here; I thought I would let what has been applied cure a bit, it makes it better for sanding.
So I started on some paddles and the yoke to keep busy; The first paddle is my funny lil honeys, she requested a short wide blade.
The handles and yoke are Hard rock maple w/ a small piece of Walnut for grip on the handle, the paddles blade is strips of Walnut, Cedar and Maple.
Check it,
Bruce


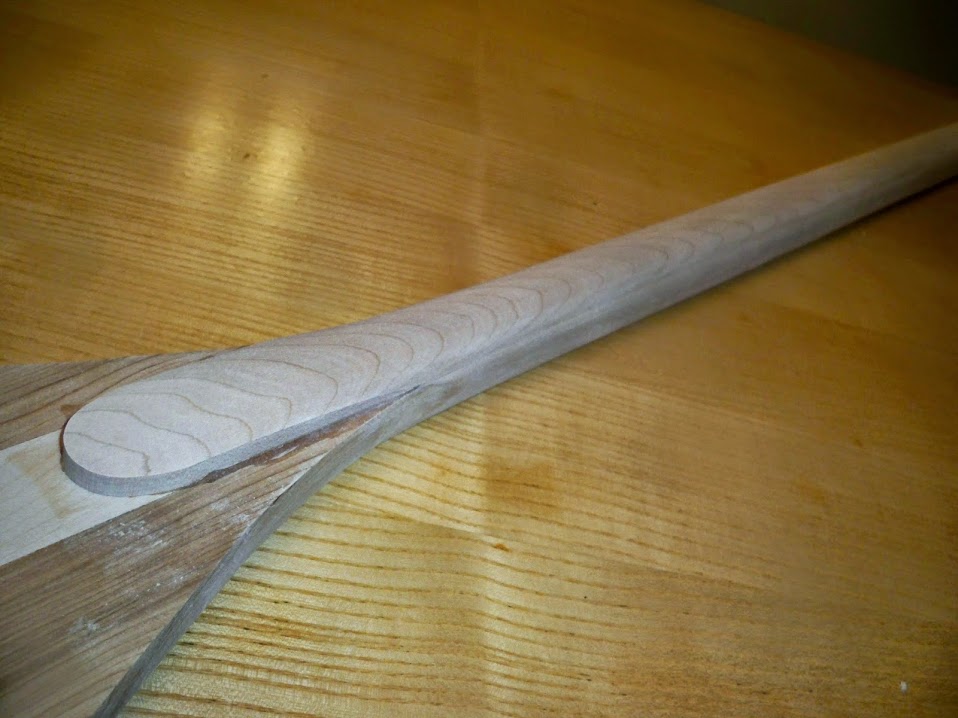


AS YOU CAN SEE THERE'S STILL A GOOD BIT OF SHAPING YET TO DO.


This time I roughed out a blank for my paddle finished the yolk slimmed down the handle on my honeys paddle and also WET sanded w/ 120 grit for about 4 hrs on one side of the hull.
The hull needs about 4-6 more hours of sanding before applying the last coat of fill resin, then it will have to be sanded all over once again w/ 180 grit.
Bruce
Bruce,
Nice work on the paddles - I like the patterns you've created. How thin are you going to shave those down to?
Gero
Thank you Gero
The blad is about 1/2" in the center and the tips will be about 1/8" - 3/16" when done; the handles are about 1" D and taper a bit wider at the handle and blade.
I saw your post about Tite Bond III and that's what I've used here, and I will glass the blades and cover the whole paddle w/ resin; They will last the rest of my life time.
This Tite Bond III is some of the best glue I've ever worked w/ in 30 years of cabinetmaking the Gorilla (wood) glue is very good also but not water proof.
CASCOPHEN would be the best of all of them but would have left dark lines or I could have used epoxy resin; but what a mess to work with.
Bruce


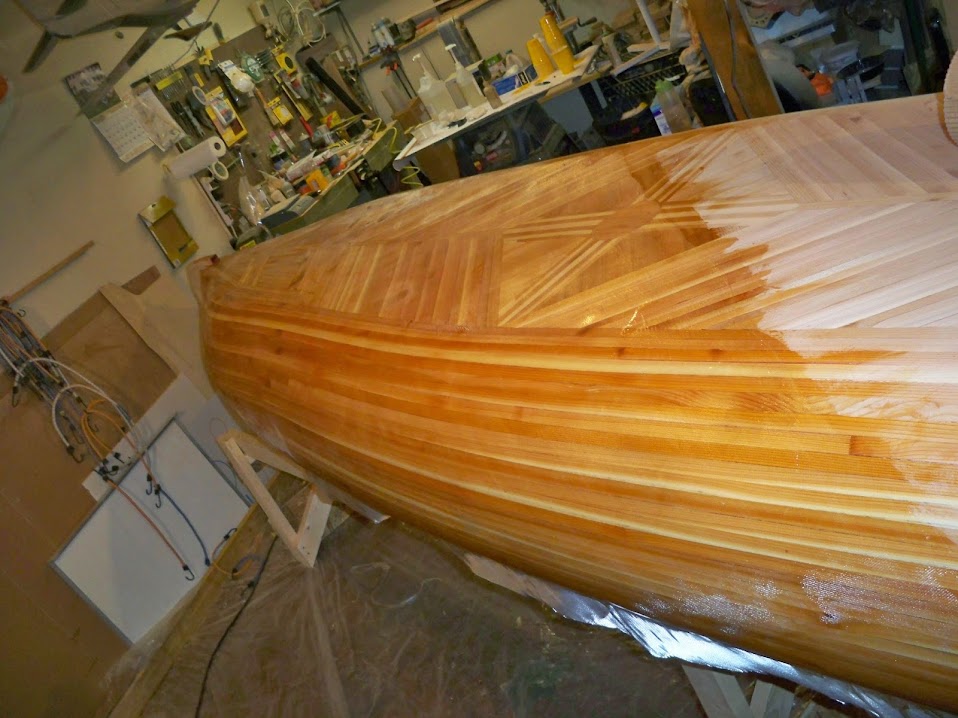
Well the final fill coat of resin is down it will come off the form tomorrow.
Bruce
Off the form w/ the top edge trimmed and rough sanded.
There's not as much glue mess inside as I thought there would have been; although it needs some touch up's around the top edge, but it's nothing some sanding and resin can't fix.


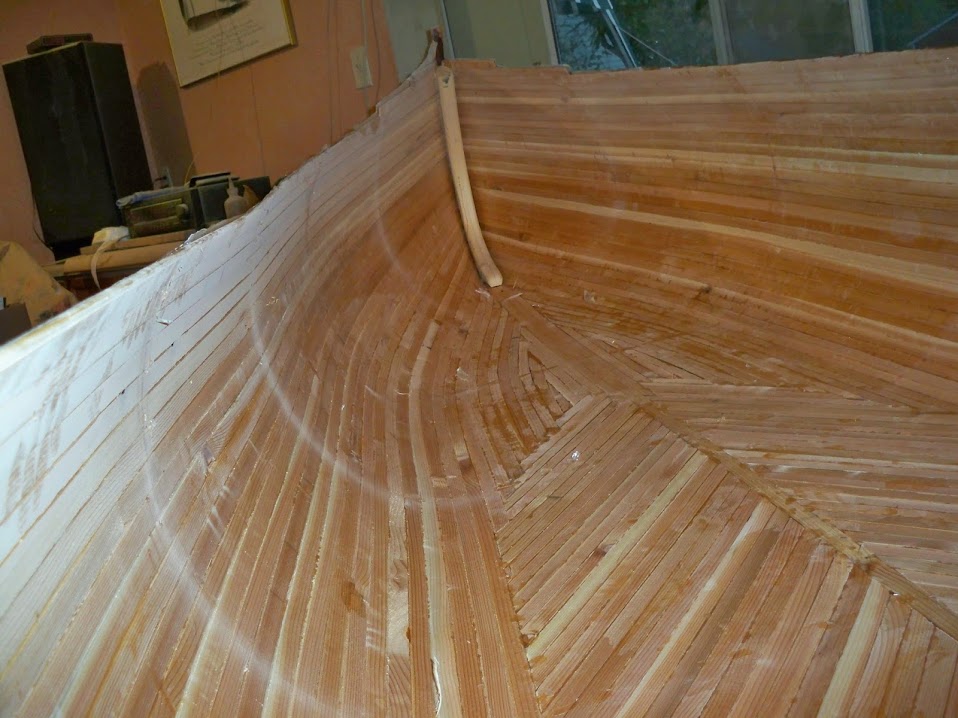


The inside: first side and bottom scraped rough sanded and puttied.
Bruce
Okay I sanded & puttied all day inside and the out side; the out side has no more orange peal and the inside needs just a bit more sanding, I'll get to that in the morning.
I have two questions though; one I've already asked but never got an answer, do I need to add stainless screws to the keel even though I glued it down w epoxy resin and taped the sides? or is this extra weight and over kill?
I know I need to reinforce the inner stem w/ 6 oz glass cloth befor glassing; but should I apply a thin coat of resin to the whole inside to make sure all the voids are filled before glassing the inside, while I'm glassing the stems?
Thanks to anybody that helps,
Bruce
screws are not necessary. its epoxied and glassed. nothing more needs to be done.
with respect to 'reinforcing' the inner stem....not sure that is necessary beyond glassing the inside of the hull. sometimes people put an extra strip of cloth in the stem/stern becuase they can't get a the same 'big' piece of cloth they are using for the inside to also work into the stem or stern without fold developing. so they will glass the stem and stern with a small piece of cloth and then when they come in with the big piece of cloth for the rest of the inside, they cut it short and don't try to get into the stem or stern....but at least overlap it slightly with the glass that was already placed there.
that said, and this relates to your last question. if you don't have a smooth surface to lay the cloth on, you will develop voids/bubbles under the glass which don't look nice and is not strong and become places water inevitably works its way into. in the stem and stern, folks often will make a wood flour fillet so they have a nice rounded surface in the stem and stern so it will take the glass with no voids. if you don't like the look of a fillet, you can spend time working the wood to get a smooth surface.
on your question about pre-coating with epoxy. i make it a practice to apply a 'seal coat' before applying glass. a seal coat of epoxy is a quickly applied thin coat of epoxy that seals the wood and prevents it from drinking any more epoxy. the seal coat is applied and allowed to cure. it should not make the wood shiny or look like a finish....you are just sealing the pores. this way, when you apply the glass, the epoxy that is being used at that time, is staying where you expect it to be wetting out the glass. makes the glassing process easier to manage....often keeps the boat lighter and helps avoid out-gassing (little bubbles developing under the glass). the other advantage of a seal coat is it helps expose any voids that really should be filled/dealt with before the glass goes on. lot easier to deal with it at this point that after the glass is there.
looks like you are moving along swell,
howard
Howard.....Thank you so much for answering my questions this will help me tremendously.
I'm not going to worry about the look of the inerstems because they'll be covered w/ a bulkhead panel, but I'll reinforce them w/ glass; leave off the screws and give the inside hull a seal coat first then check for any voids once again.
Then I'll glass the inside; I was thinking of over lapping the flat bottom only w/ two layers of 4 oz cloth, the sides will get one w/ two fill coats of resin on everything.
Thank's again,
Bruce
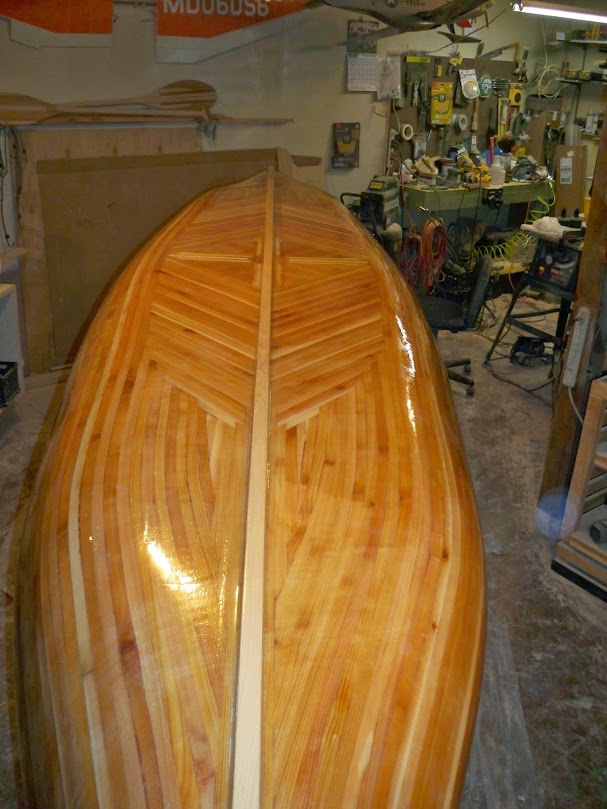
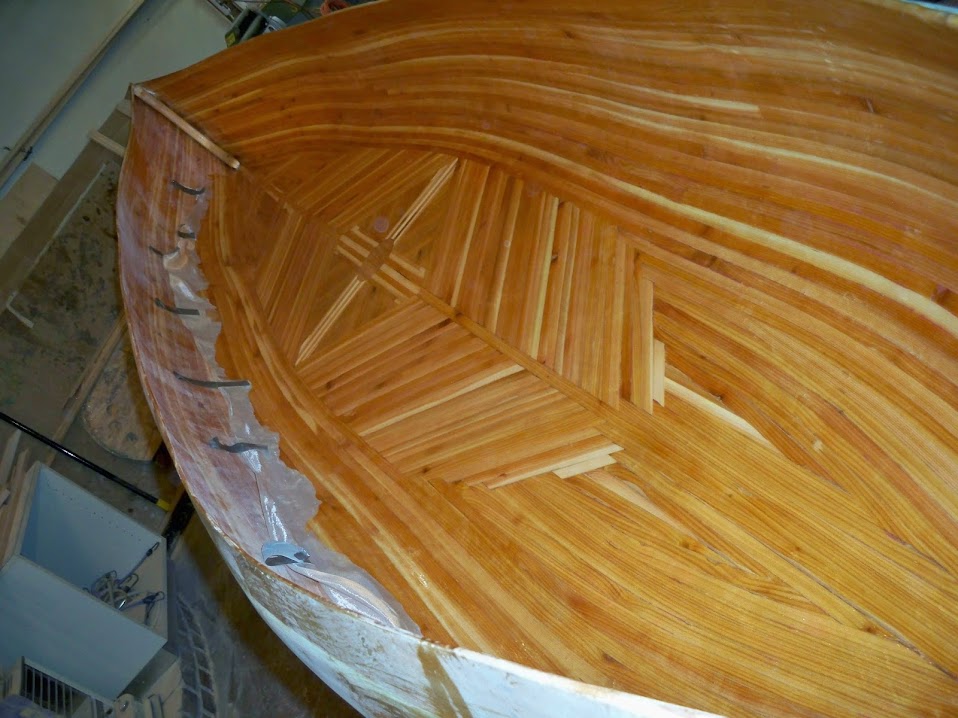
Okay that's done here it is so far;


After sanding I reinforced the inner stems w/ 6 oz. cloth and resin; while doing this I gave the whole in side a light coat of resin, this makes it easier when the glassing begins.
The wood won't be able to soak up so much resin and you use less and have less a chance of getting bubbles. 
")
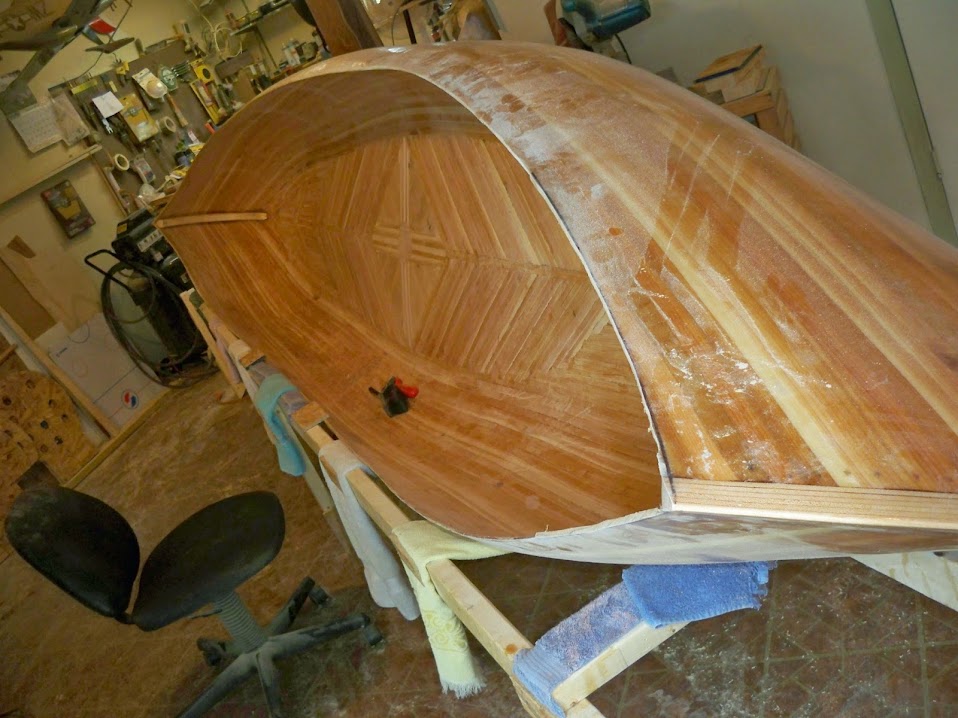
It's not perfect inside but I'm not entering any contest this boat is to be used and will be just fine for me and my honey. 
But you can now see what it will looks like for the most part w/ out the seats and gunnels,decks and yolk.
Check it out,
Bruce
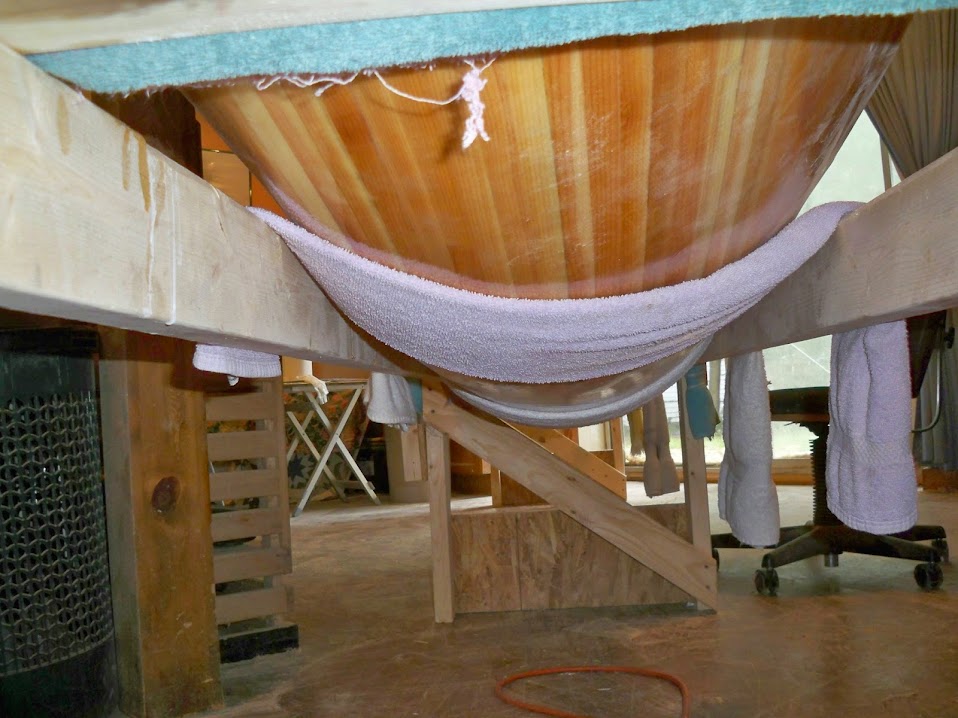
GLASSING THE IN SIDE:


Okay update: I started at 10:00AM laying resin and finished 3 hrs later you get this; the fiberglass sheet wouldn't cover the entire project  So I get to do the same thing once again in the opposite direction.
But this will give me 2 layers of 4 oz cloth on the bottom a total of 12 oz.
I wrapped it around the top edge where it only got one layer on the top out side edge.
This will get more resin once the Inwall , Scuppers and Gunnals go on.
Check it,
Bruce