Todays progress update,


Well after sanding and prepping the hull for the next fiberglass sheet; I wet on to finishing the Bow & Stern decks and had a look at the inwale and scuppers w/ the gunwale clamped in place to see how they will all fit together.
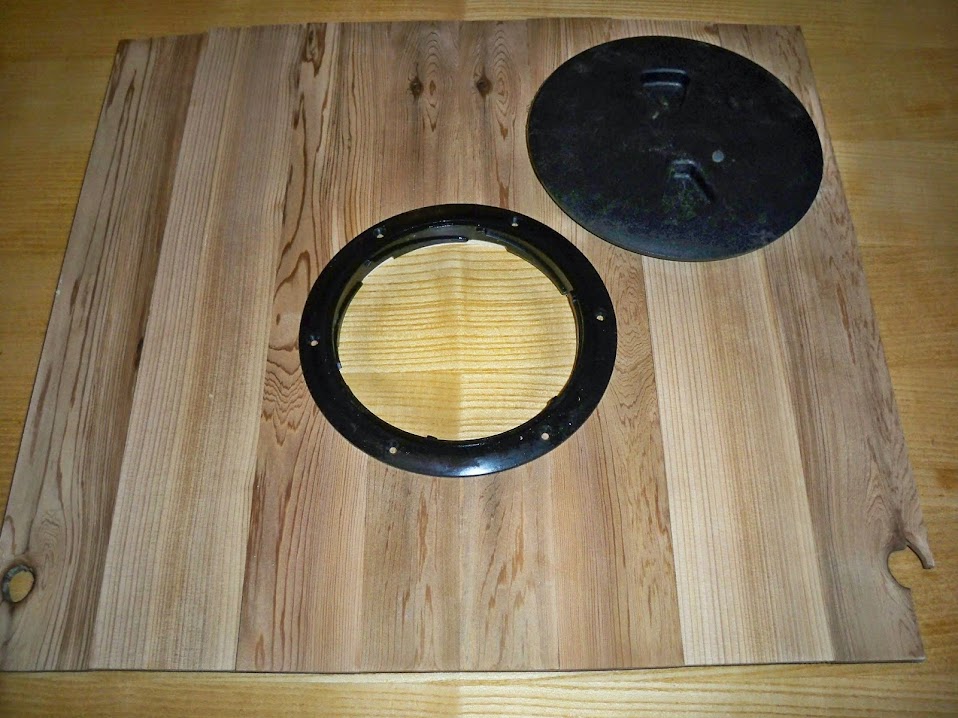
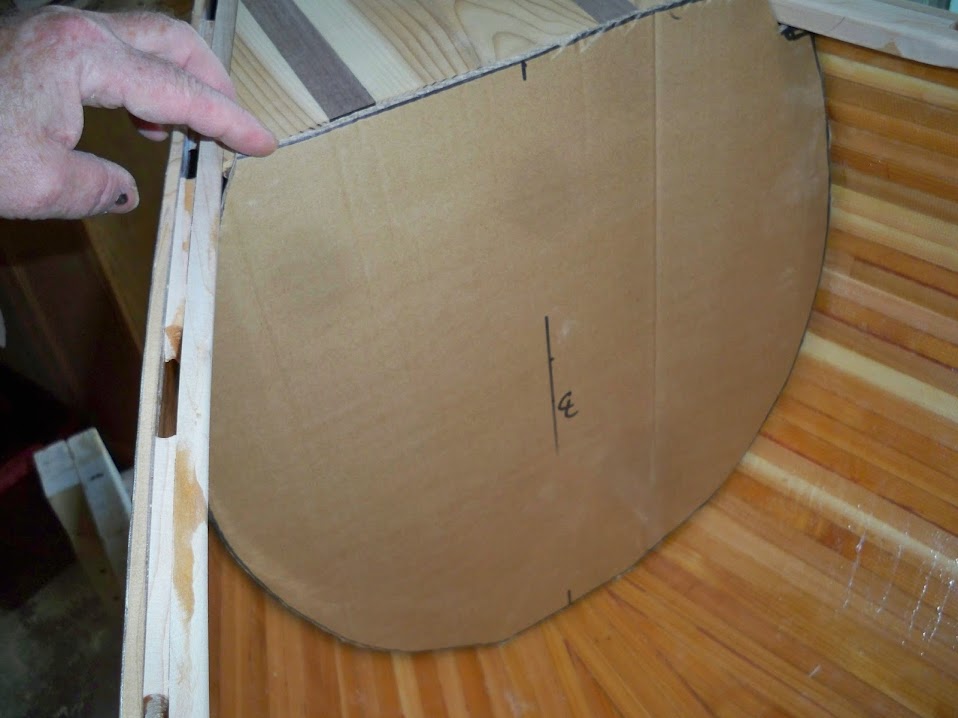
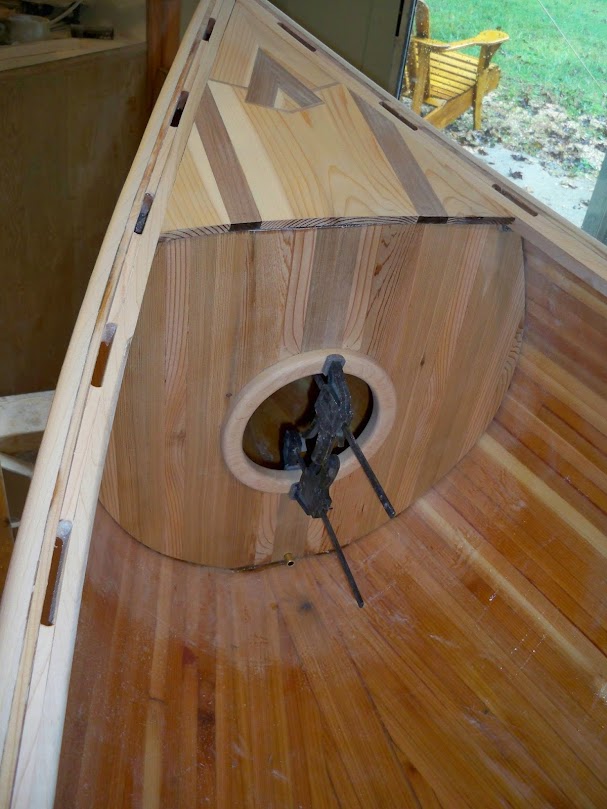
I also worked on the bulkhead Bow water proof storage compartment; I installed a ring around the 1/4" panel that will be fiber glassed on both sides.
I will most likely make another storage compartment in the stern but it will be open air w/ an oval opening and possibly a Maple rack inside.
Bruce
LAST OF THE GLASS IS DOWN ON THE HULL,
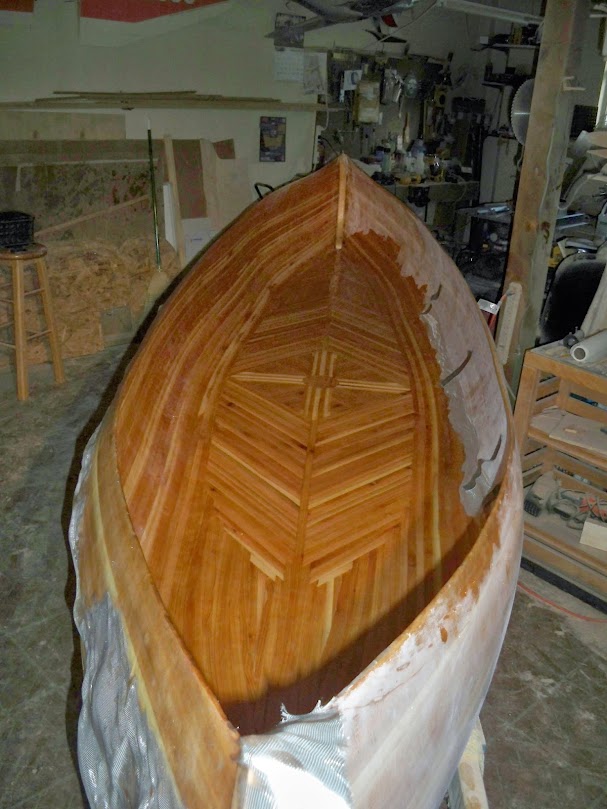


Well the last layer of glass is down 


And it looks tight and smooth it still needs a fill coat and some sanding touch up's and light resin coat on the outside top edges.
Then then the Maple trims, seats, yolk, bulkheads and decks start going on.
Bruce
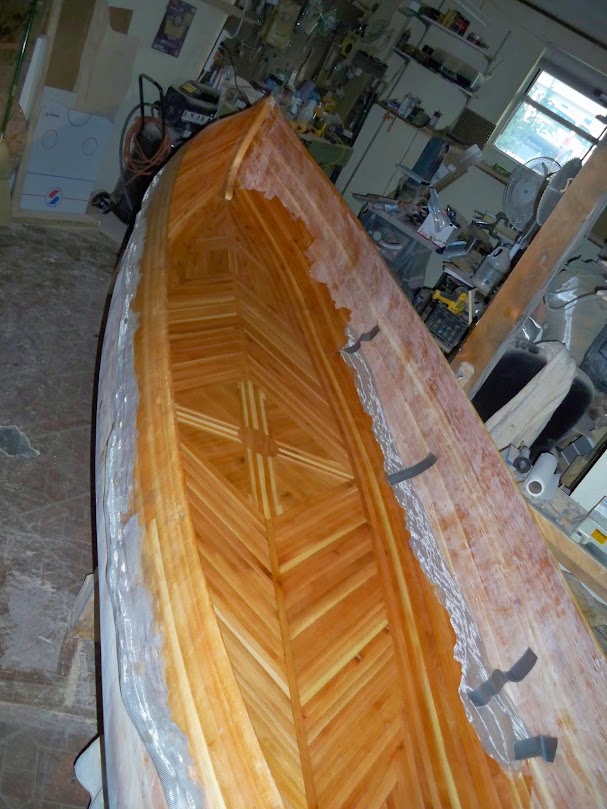
The final fill coat of resin was applied to the inside and the outside top edges today; Most of the fiberglass work is now finished except the decks and bulkheads.
Next it mounting the scuppers w/ resin; then inwale and gunwales.
Bruce
Bruce,
looking good. Just out of curiosity, what to you estimate the final weight of the canoe to be when all is said and done?
Gero
Gero..... The plans say 74 lbs?? When built in Redwood w/ a standered set of seats?
My seats will have backs on them; and there will be at least one bulkhead compartment ( the Bow) and they didn't have scuppers on the one in the plans either.
my guess 85 - 90 lbs??
Bruce
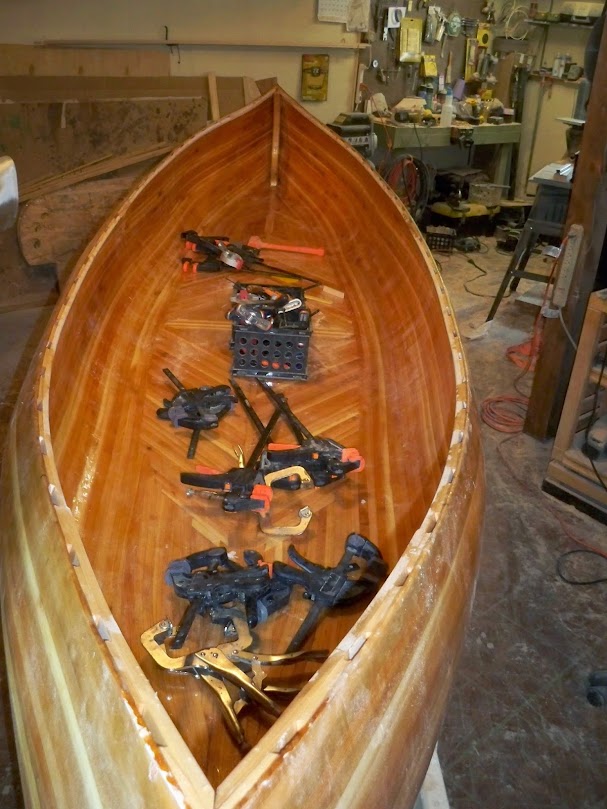
SCUPPERS ADDED,


Well it took a bit of time and two batches of epoxy to get them all glued on today; I made kerfs in the longer Bow strips to get the curve. These wil be covered w/ 7/16" x 3/4" Maple strips once everything has cured and a 1" stainless screw will go in each of the scuppers; all the way through to the Gunwale and be caped over w/ a maple pluge.
Bruce
Okay well I've sanded the inwales flush w/ the scupers and I'm ready for gluing the gunwales.
I've also have fitted the sterns deck and have it resdy for resin; there was one scupper that was to low so I made a piece to fix that.
Next I'll glue the Gunwales and add a scarf joint just like I did on the inwales; the yolk will connect through these seams tying everting toghther making them stronger.
I've also made the open air stern bulkhead and a porthole from two pieces of Maple; once I have the Bow bulkhead ready the backs will be glassed and I'll glue in the stern deck.


 Until next time.
Bruce
Okay update,


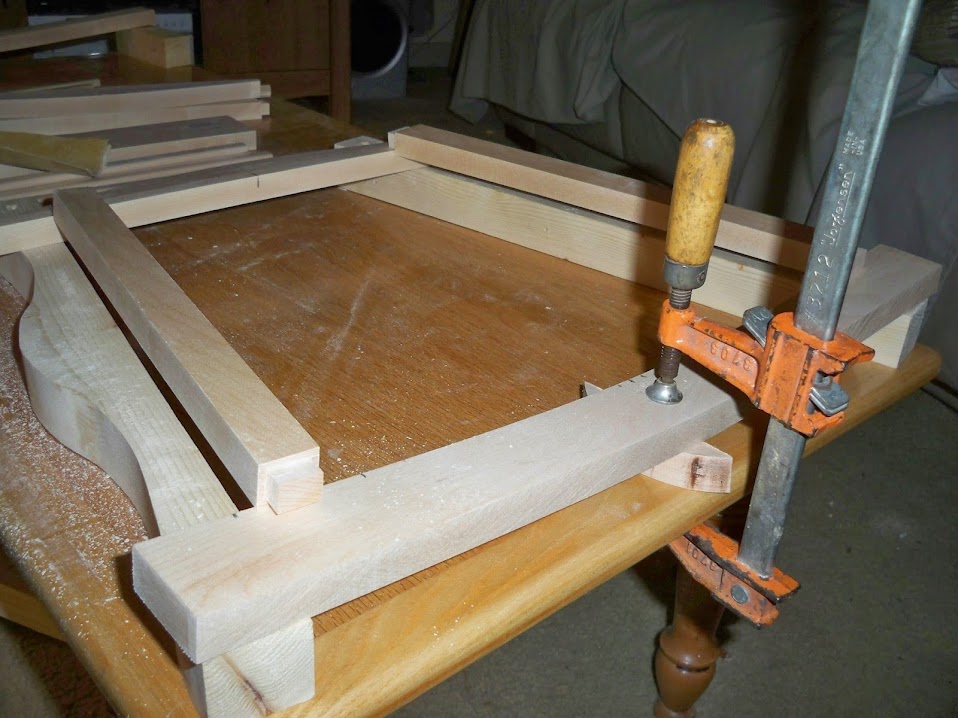
 Okay the progress has slowed because of waiting on resin to cure; but the gunwales are on and I'm now bending the the seat frames and then setting the yolk.
I had to finish the gunwales first before adding the bulkheads then the decks will be added each time it's a 24 hr wait for resin to cure.
The gunwales were screwed on w/ #10 - 1" stainless steal screws every 6" -7" depending on the placement of the scuppers; these will be caped w/ Maple plugs so you don't see the screws, and sanded flush to match the gunwale.
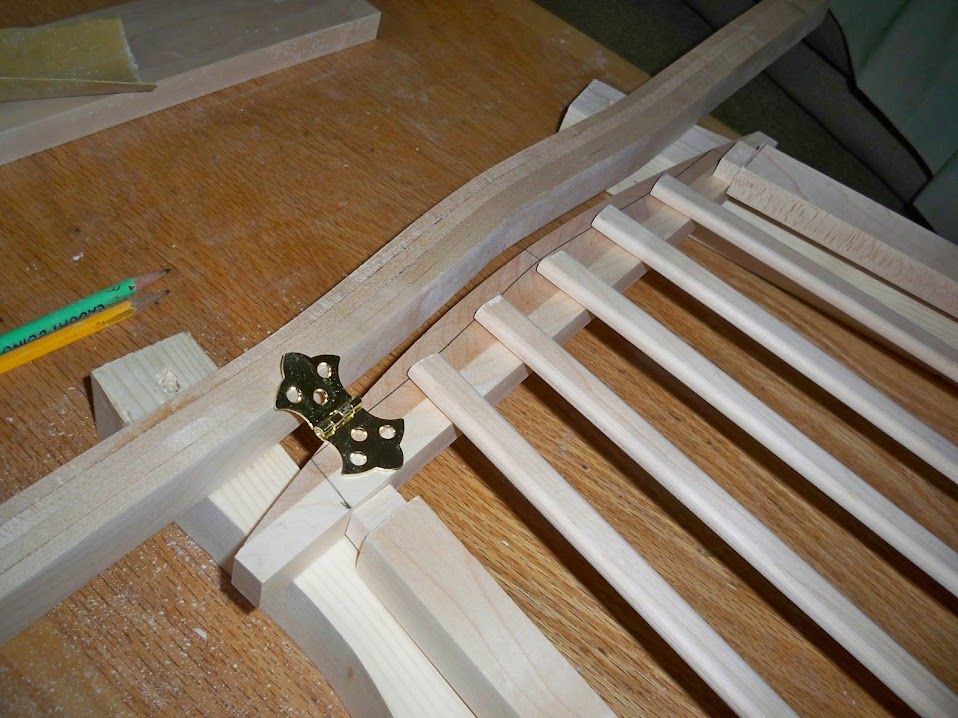
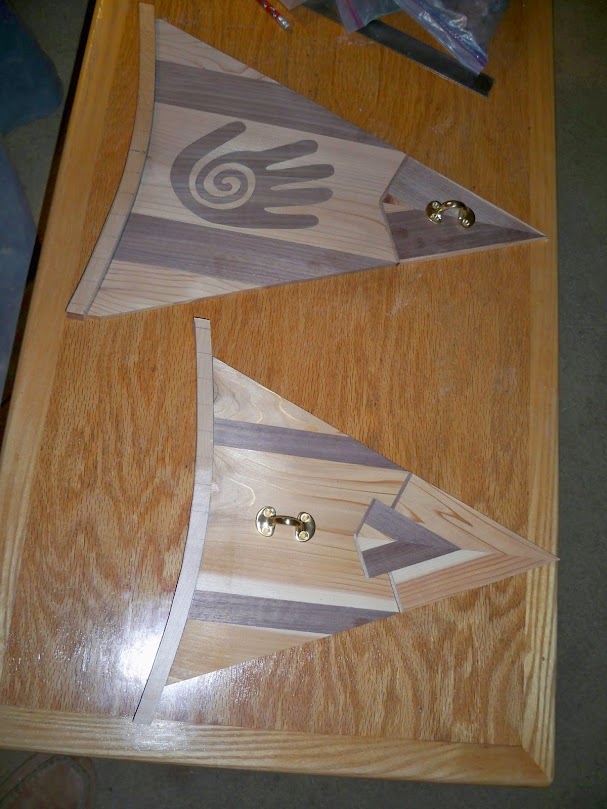
I'll be bending the back rest for the seats as well, and both pieces will have a wedge shape angling to the small of the back; and these will be hinged w/ brass hinges so they can lay flat for transportation.
Bruce
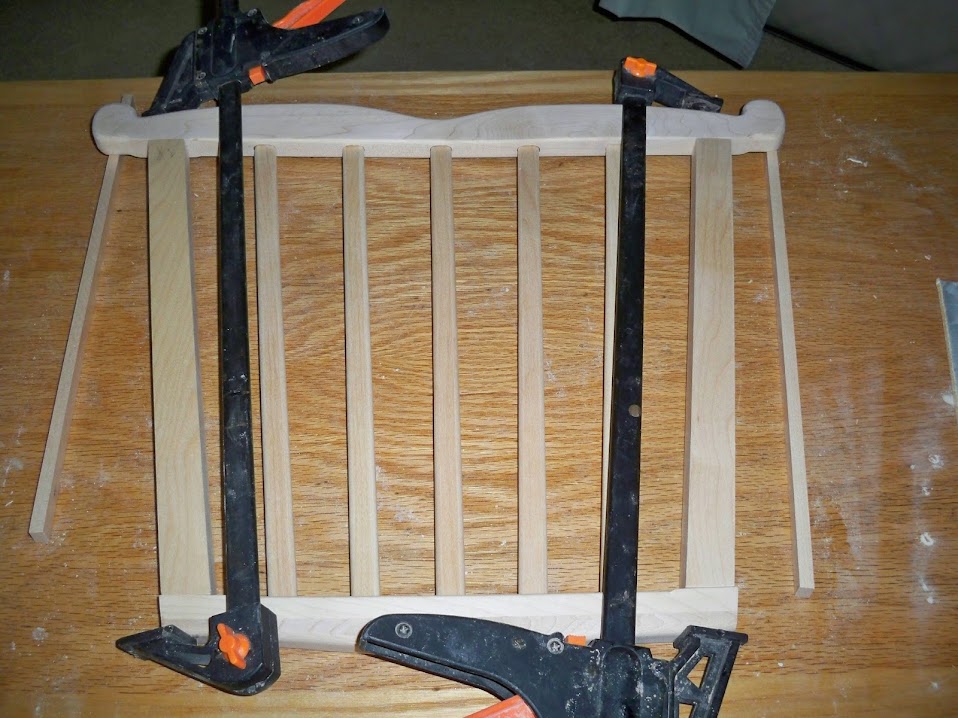
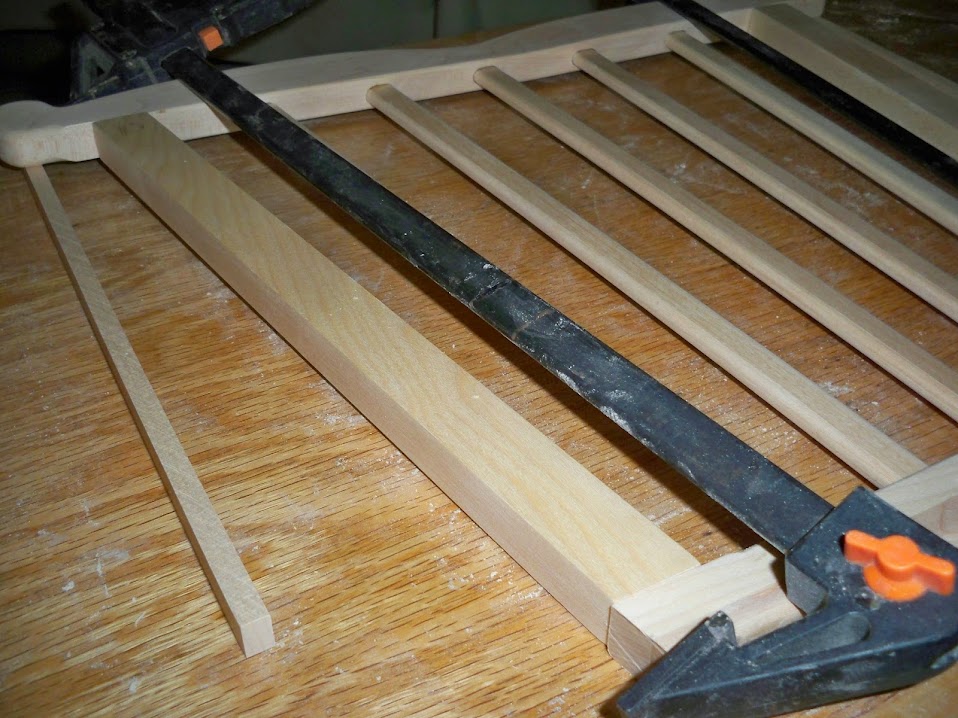
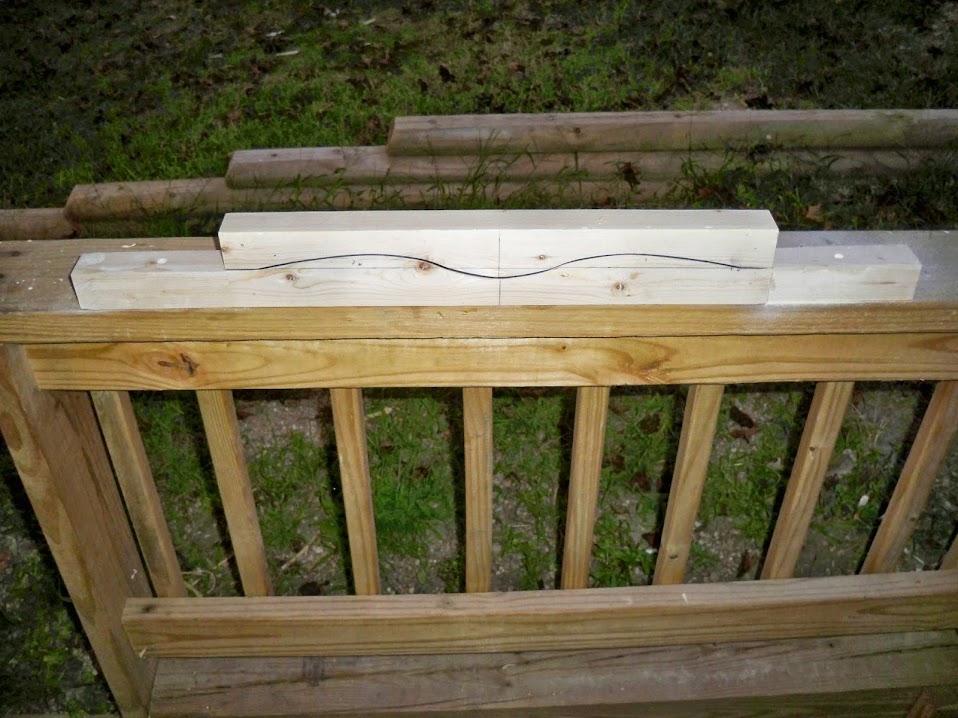
Yolk rough fitted and first seat rail bent.


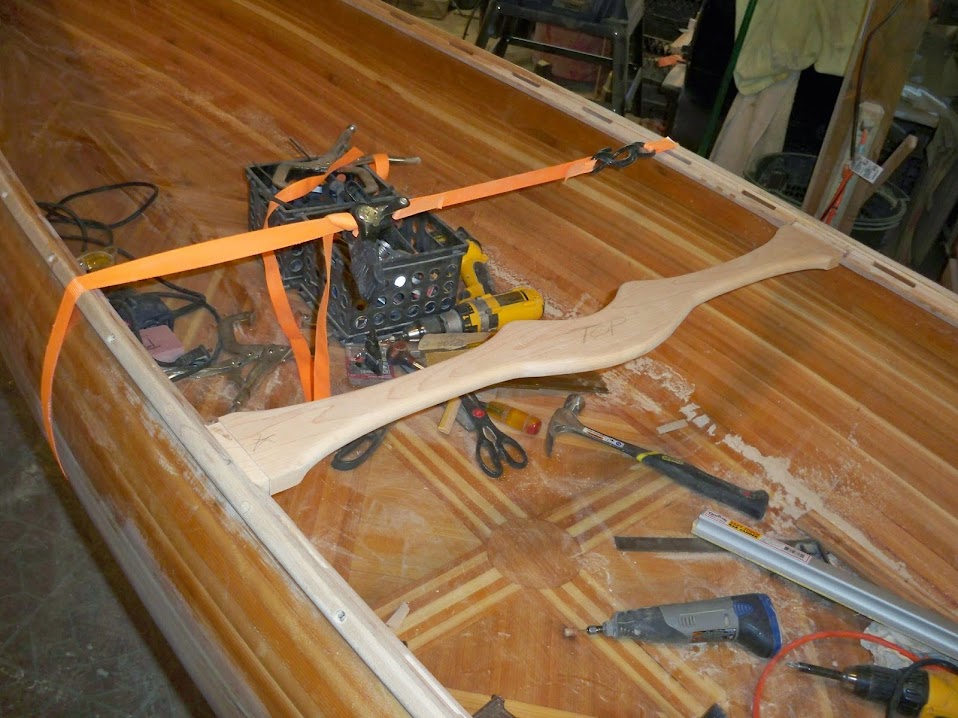


This is the back of seat rail for the forward seat.
Bruce
Update:


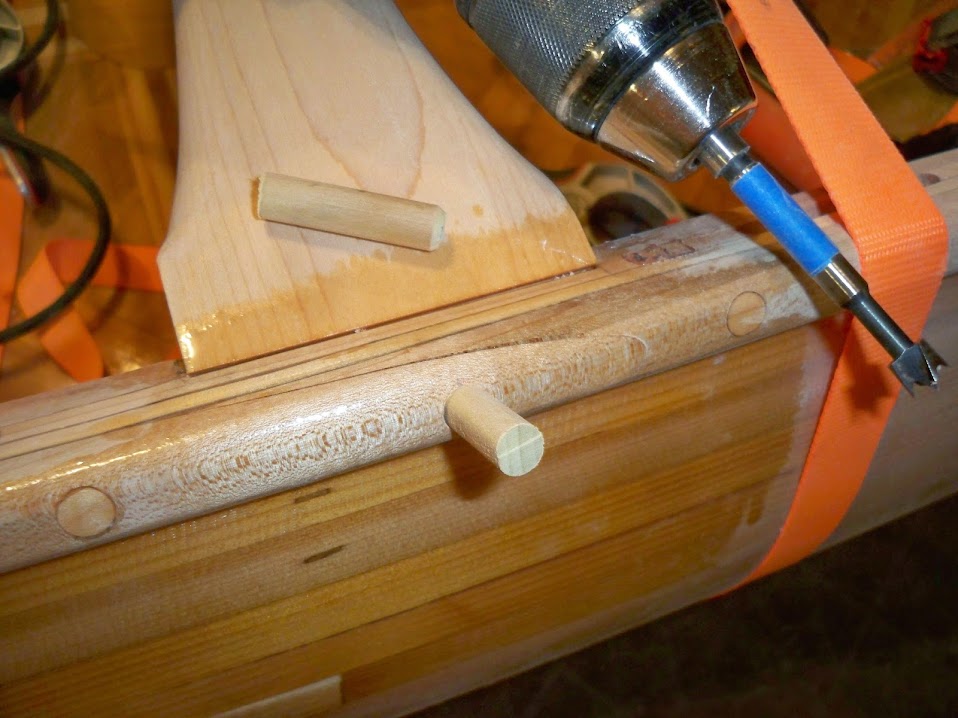
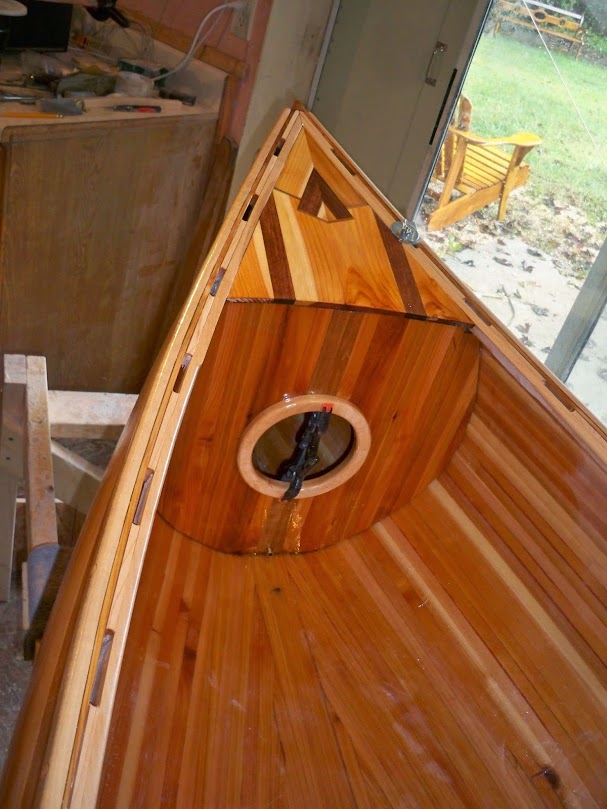

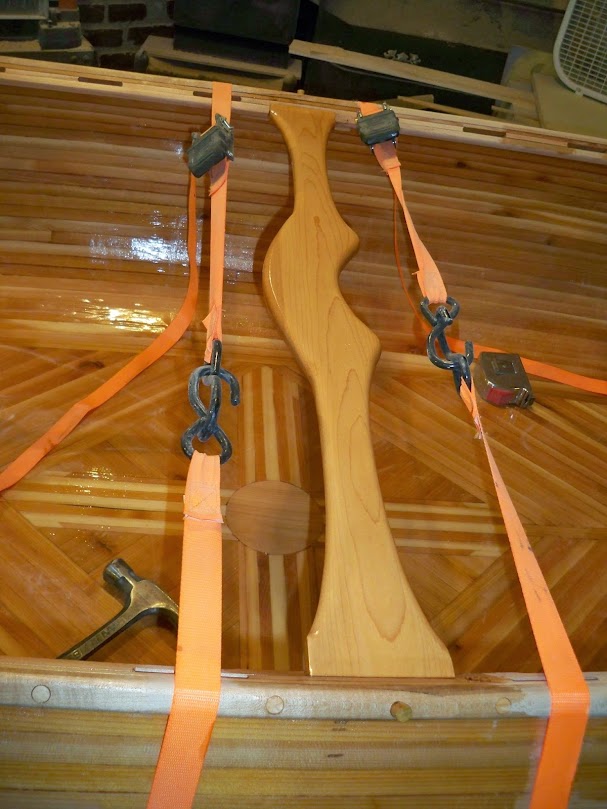


Update: Plugs in the screw holes: aft deck & bulkhead porthole glued in; and I added a 3/8" dowel through each side of the yoke.
Amazingly explained and neatly depicted through such a large number of very beautiful photos of different parts and of course different views of make up of these wooden boats ,perhaps there may be use of red meranti and teak logs in some parts along with use of metallic strips of great strength with high technical precision. I love very much and enjoyed to greater extant of all these unique photos.
Thank you Jose for your kind words......I've just realized that I missed posting how I instaled the bulkhead w/ the porthole; once I had a good fit I held a square w/ two scraps of wood and hot melt glued the seams from the inside.
This held the bulkhead in place while I glassed the back of the panel.


I'm now fitting the bow deck and bulkhead and working on the seats more photos in a day or so.
Bruce
CANOE UPDATE:


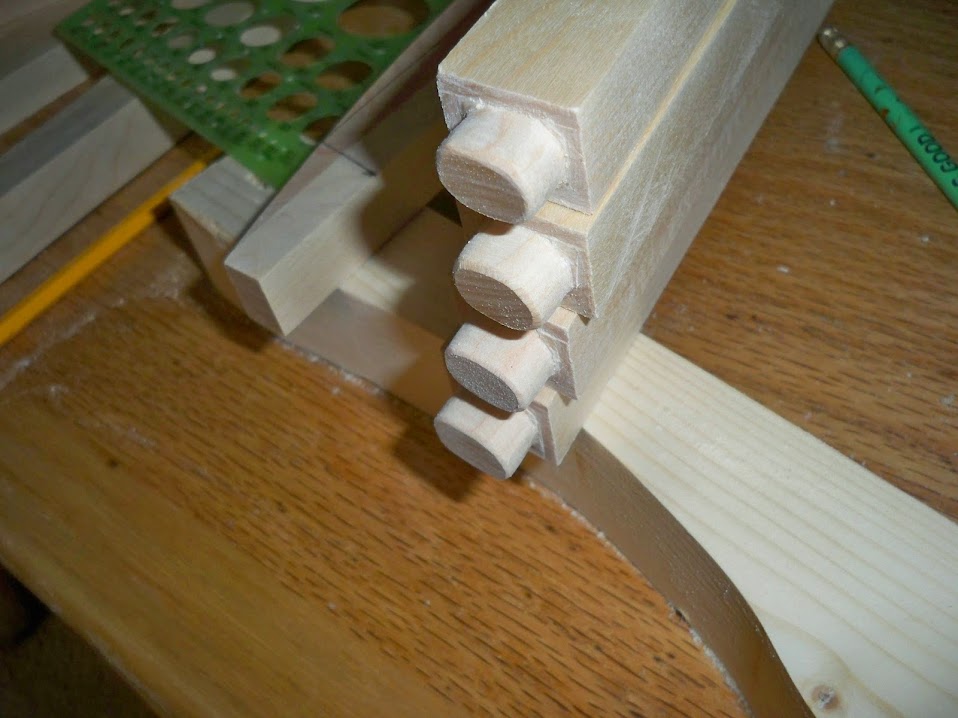
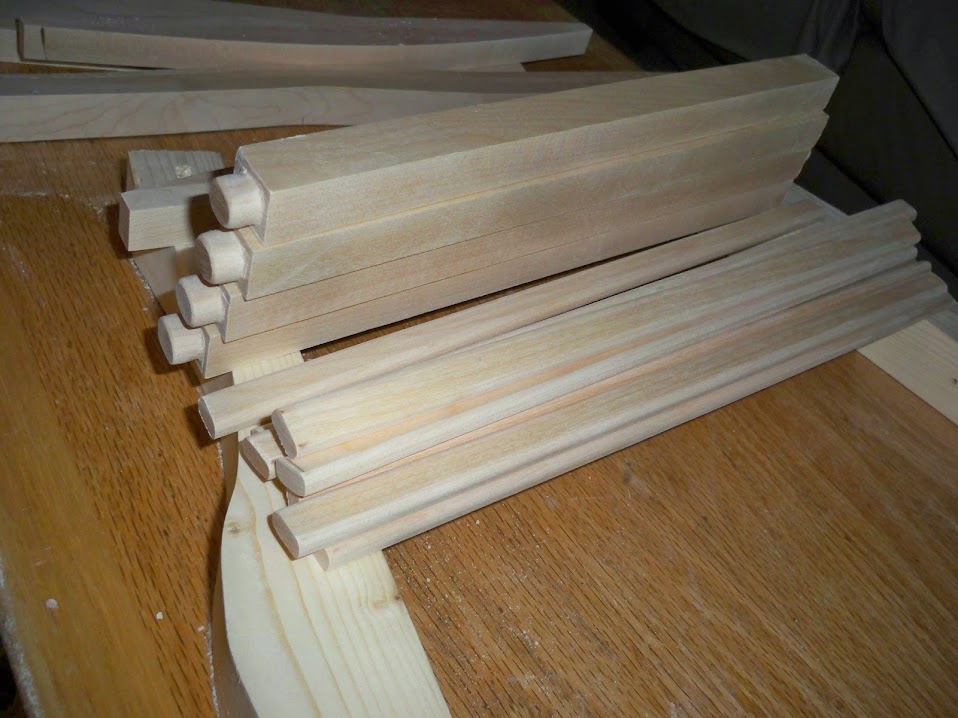
 Well I made the Maple trim for the aft deck, glued the first set of seat rails, fit the Bow bulkhead and deck and have the second set of seat rails soaking in hot water; they will be steamed later on today and bent I'm trying to get more bend in these there the front rails.
I'm also working on the upper section of the seats these ( the seat backs) will have a slight bend on the top, and I think I'll make these all from wood no webbing like the seat will have.
Question:
How important is it to glass the decks? or can you get away w/ just a few coats of epoxy resin before varnishing?
Bruce
my recomendation is glass the deck. it will be much tougher relative to just a couple epoxy coats.
you can do deck glass relatively light. 4 oz cloth is just fine and easy to work with. wets out easily, fill coats -- only about another two coats and you are ready to go.
the weave holds the epoxy coat together much better than raw wood where in my experience, micro cracks develop in the epoxy-only covering allowing moisture to get into the underlying wood and you start to get discoloration. never had that problem on a glassed deck.
the epoxy glass matrix has significantly different properties compared to a straight thin coat of epoxy. do an experiment on a piece of wax paper marked out with a three inch squares. square 1: three coats of epoxy; square 2: three coats of epoxy wetted-out 4 oz glass. pull the results off the wax sheet and play with the results. square 1 will basically crack/crumble. square 2 will be a very tough piece of plastic. which one do you want on your deck now?
not a lot of extra work relative to several coats of epoxy done at this stage.
howard
Great explanation Howard.... That's what I'll do, I'm just hoping Ihave enough epoxy resin left in the jugs or I'll have to buy more?
I'm working on the seat rails and preping the back of bulkhead & underside of the deck getting them ready for glass.
Bruce
Thank you Howard: I'm going to try and get some glassing done on the bulkhead and decks today.
Bruce
UPDATE: SANDING , SANDING, SANDING


 Well I had to sand where the bulkhead will be glassed in place and I also wanted to sand under the inwales and scuppers plus blend in the piece I added under the yoke; While doing this I was covered w/ dust and so I just kept sanding.
This was the first rough sanding w/ 120 grit to ready the hull for varnish; I was trying to sand down all the drips and Orange peel there's still more to do, then it will be sanded w/ 180 / 220 grit everywhere and finally some varnish will get applied 5 -6 coats sanding in between each coat.
So there's going to be some sanding,sanding,sanding,sanding,sanding and more sanding, in the weeks to come.
Bruce
bruce,
i noticed you said you were covered with dust while epoxy sanding.
i would just like to say that it's important to have a vacume system and some protection from epoxy dust. it can generate an alergic reaction and is pretty bad stuff for your skin and certainly your lungs.
with the skin contact, its often an alergy/sensitivity that will develop after repeated exposure and can put your epoxy boat building days in jeapordy.
apologies if i read something that wasn't really there. i know a lot of folks are reading how your build is going and wanted to make sure people were aware of the need to avoid epoxy dust contact with skin and lungs.
looks like it is coming along great.
howard